Annotation Task Workflow
Once a task has been created, users assigned as labelers can begin annotating images. The platform provides a range of tools to facilitate the annotation process, allowing easy navigation and labeling of objects within the images.
Annotation Task Home Page
When you access the Annotation Task Home Page, you will find the following tabs:
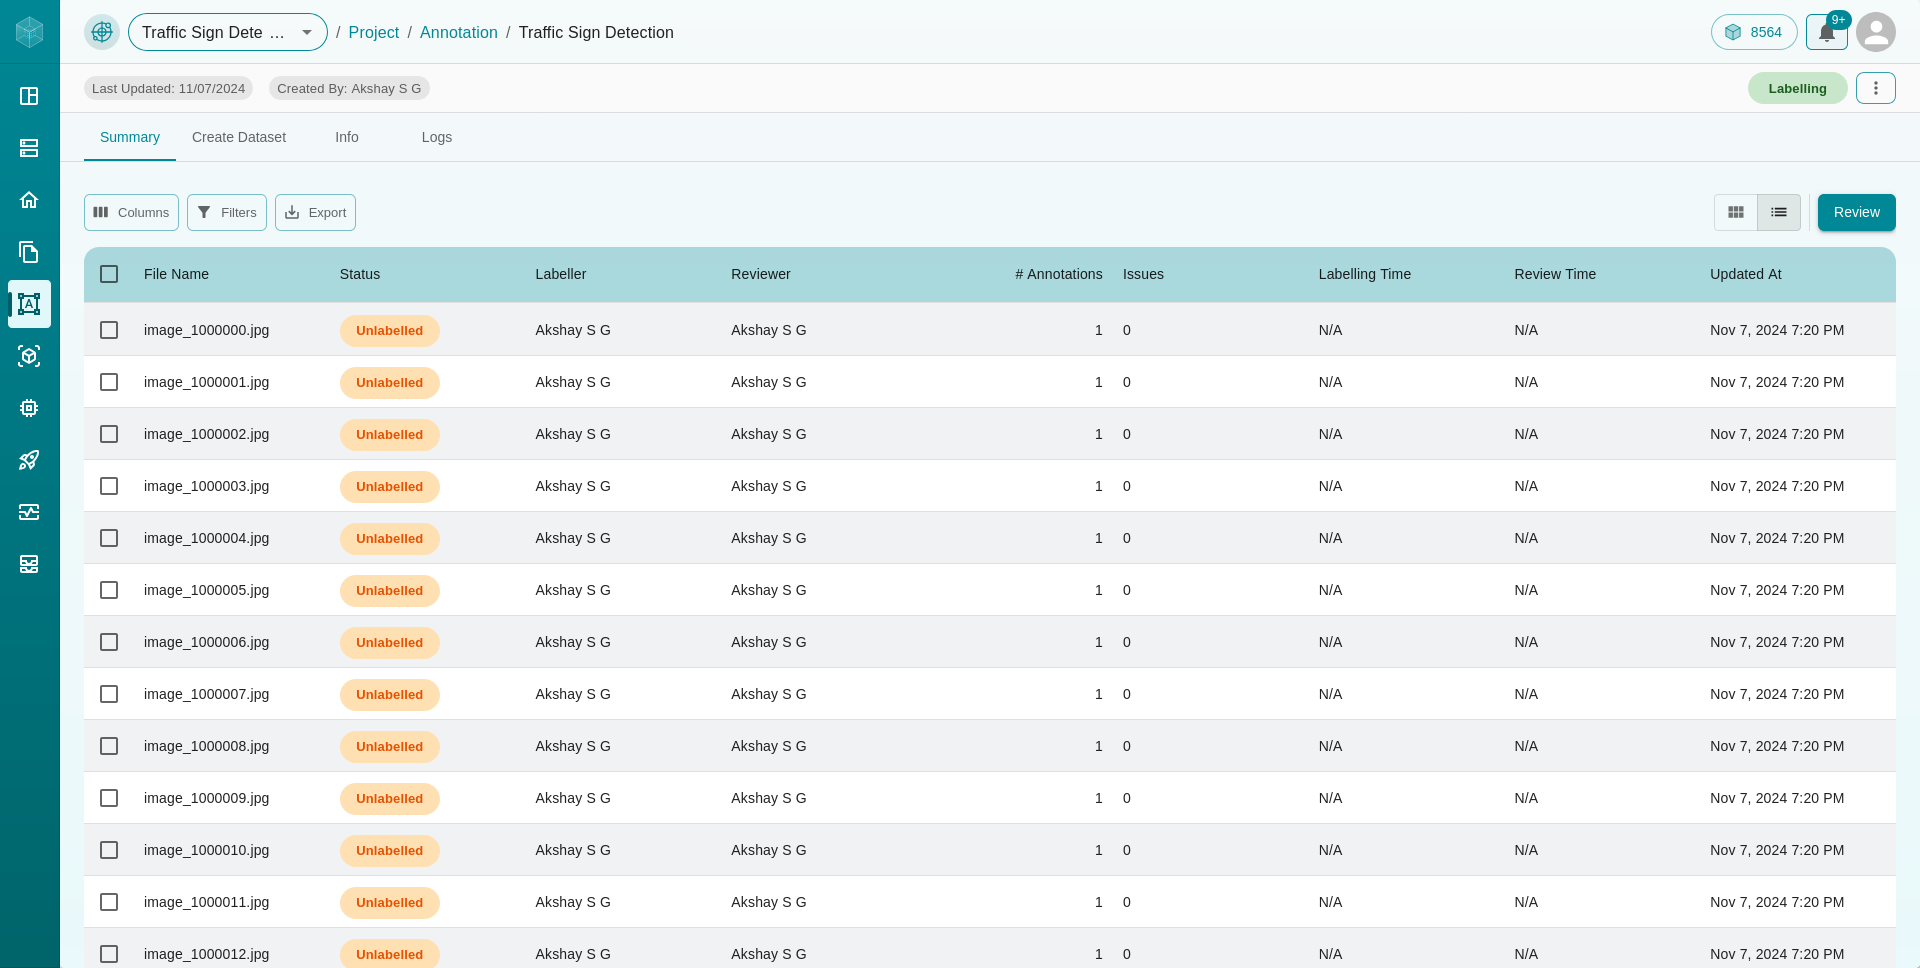
1. Summary
Provides a detailed description of the annotation process for the images in your dataset, displayed in a table format. The table includes columns such as:
File Name: The name of the image file.
Status: The current status of your annotation (e.g., Unlabelled, Labelling, In Review).
Labeler: The person responsible for annotating the image.
Reviewer: The person responsible for reviewing the annotation.
# Annotations: The number of annotated objects in the image.
Issues: Any issues reported with the annotation.
Labelling Time: The time taken to label the image.
Review Time: The time taken to review the annotation.
Updated At: The most recent update time for the task.
2. Create Dataset
Once you have annotated all images or a sufficient number of images, use the Create Dataset tab to publish the dataset with updated annotations/labels.

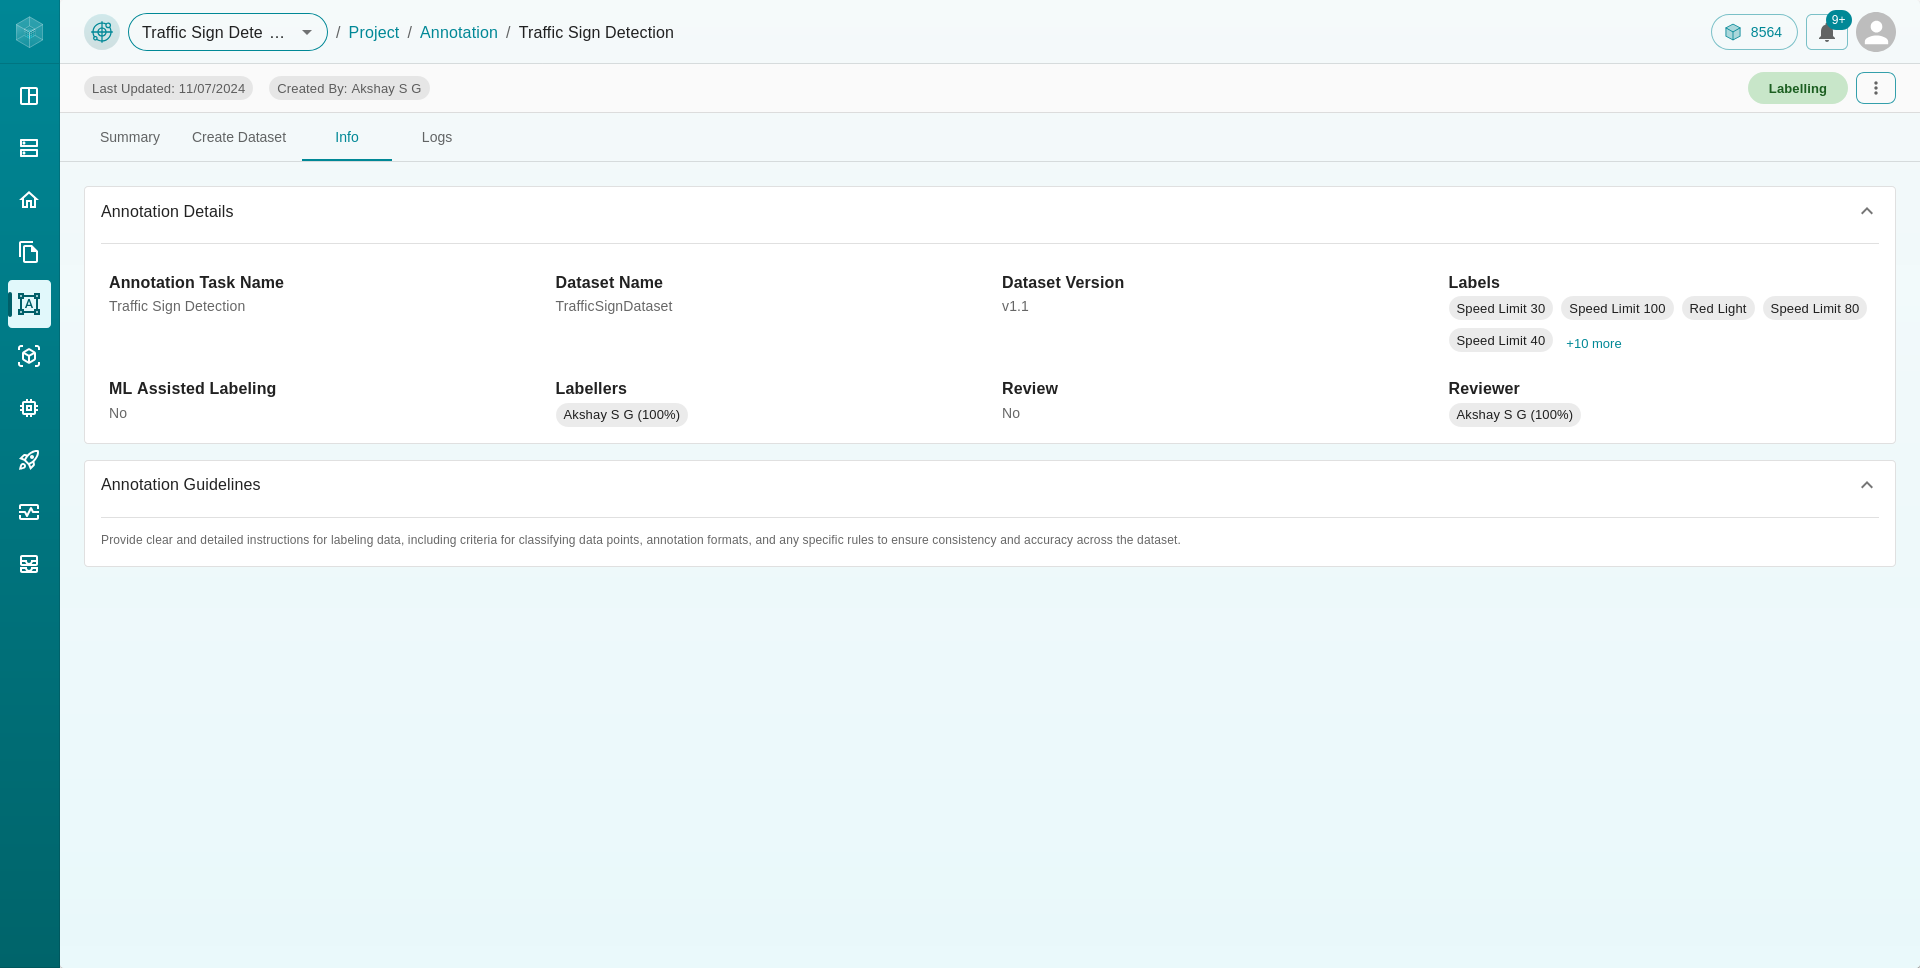
3. Info
Provides details about the task, including the task name, dataset name, dataset version, labels, labelers, reviewers, and annotation guidelines to be followed.
4. Logs
Displays logs related to the annotation’s processing, providing insights and details about the operations performed on the dataset.

Annotation Procedure
Annotating Images:
Manual Annotation
In the Summary tab, check the boxes of the images you want to annotate. You can select multiple images.
Click on the Annotate button available at the top right corner of the table. This action will take you to the Annotation Dashboard.
The Annotation Dashboard, as shown in the attached image, provides a streamlined interface for the annotation process. Here’s what you’ll find:
Image Viewer: Displays the image to be annotated.
Labels List: A list of labels available for your dataset.
Add Issue: A button to report any issues with the dataset.
History: Displays the detailed review history if the image was previously annotated but requires changes.
Guidelines: Instructs users on the guidelines required to annotate the image.
Once you have labeled an image, click on the Save button icon on the top right of the page. This action labels the image, but a reviewer still needs to review and approve the label before it is finalized.

Auto-ML Annotation:
In addition to manual annotation, users can also use Auto-ML for annotation. The images are auto-annotated by foundational models, but human review is necessary to ensure accuracy.
Creating the Final Dataset
After completing your annotations, use the Create Dataset tab to publish the final dataset with all the updated annotations/labels.