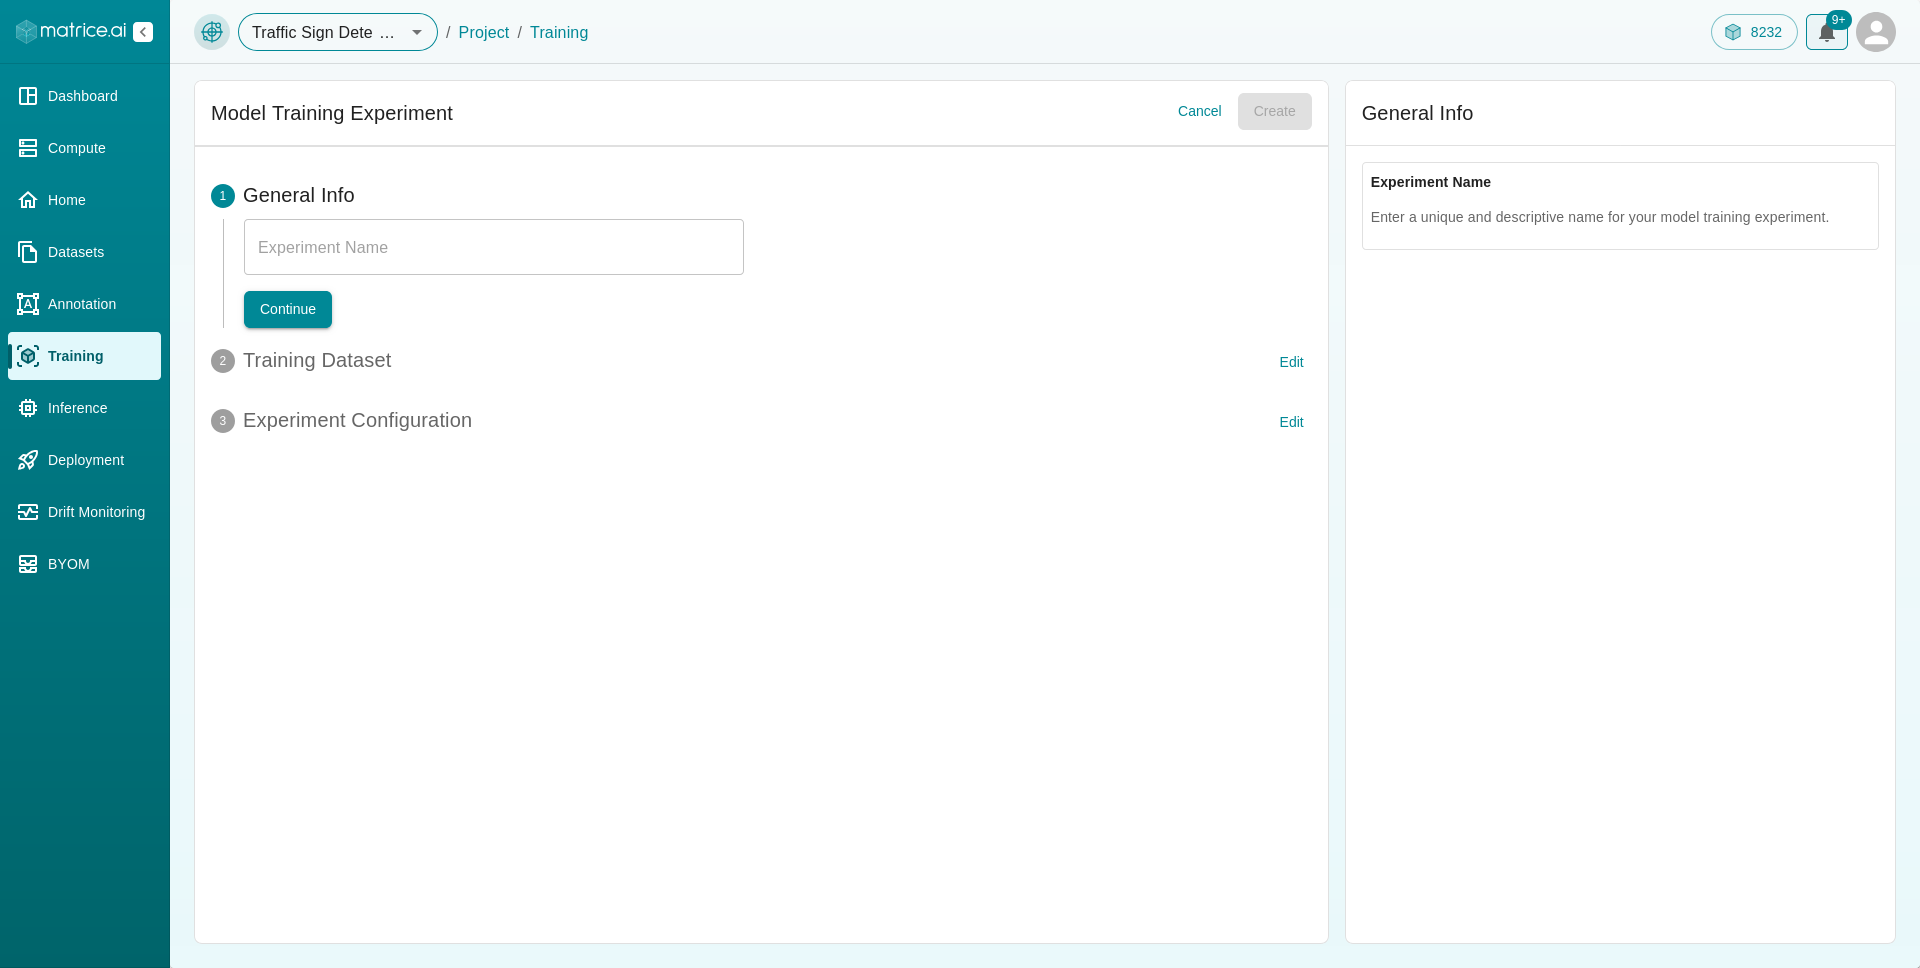
Create a New Experiment
To create a experiment, click the Create Experiment button located in the top-right corner of the table section of your dashboard. This will open a form where you need to provide the required details:


Create Experiment
General Info: Enter the
Experiment Name.
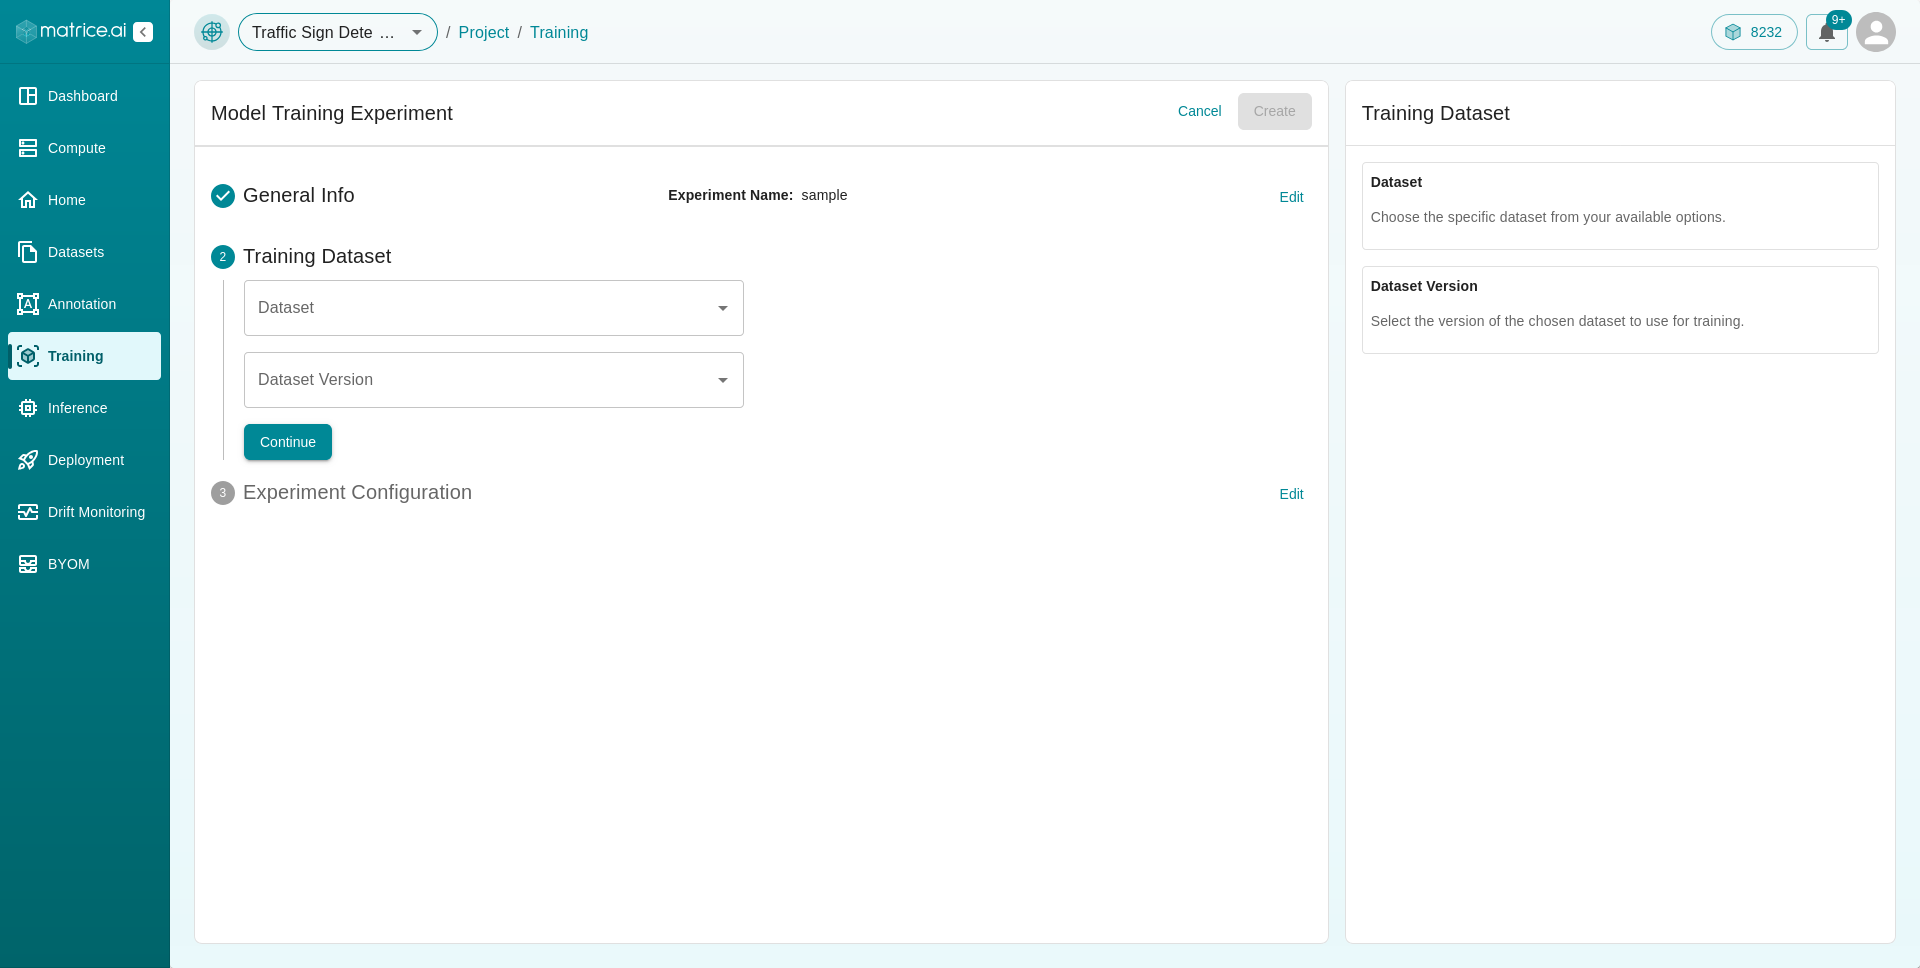
Training Dataset: Select the
DatasetandDataset Versionyou want to train the model on.
Experiment Configuration: Specify the
Primary Metric(for evaluation) and theTarget Runtime.
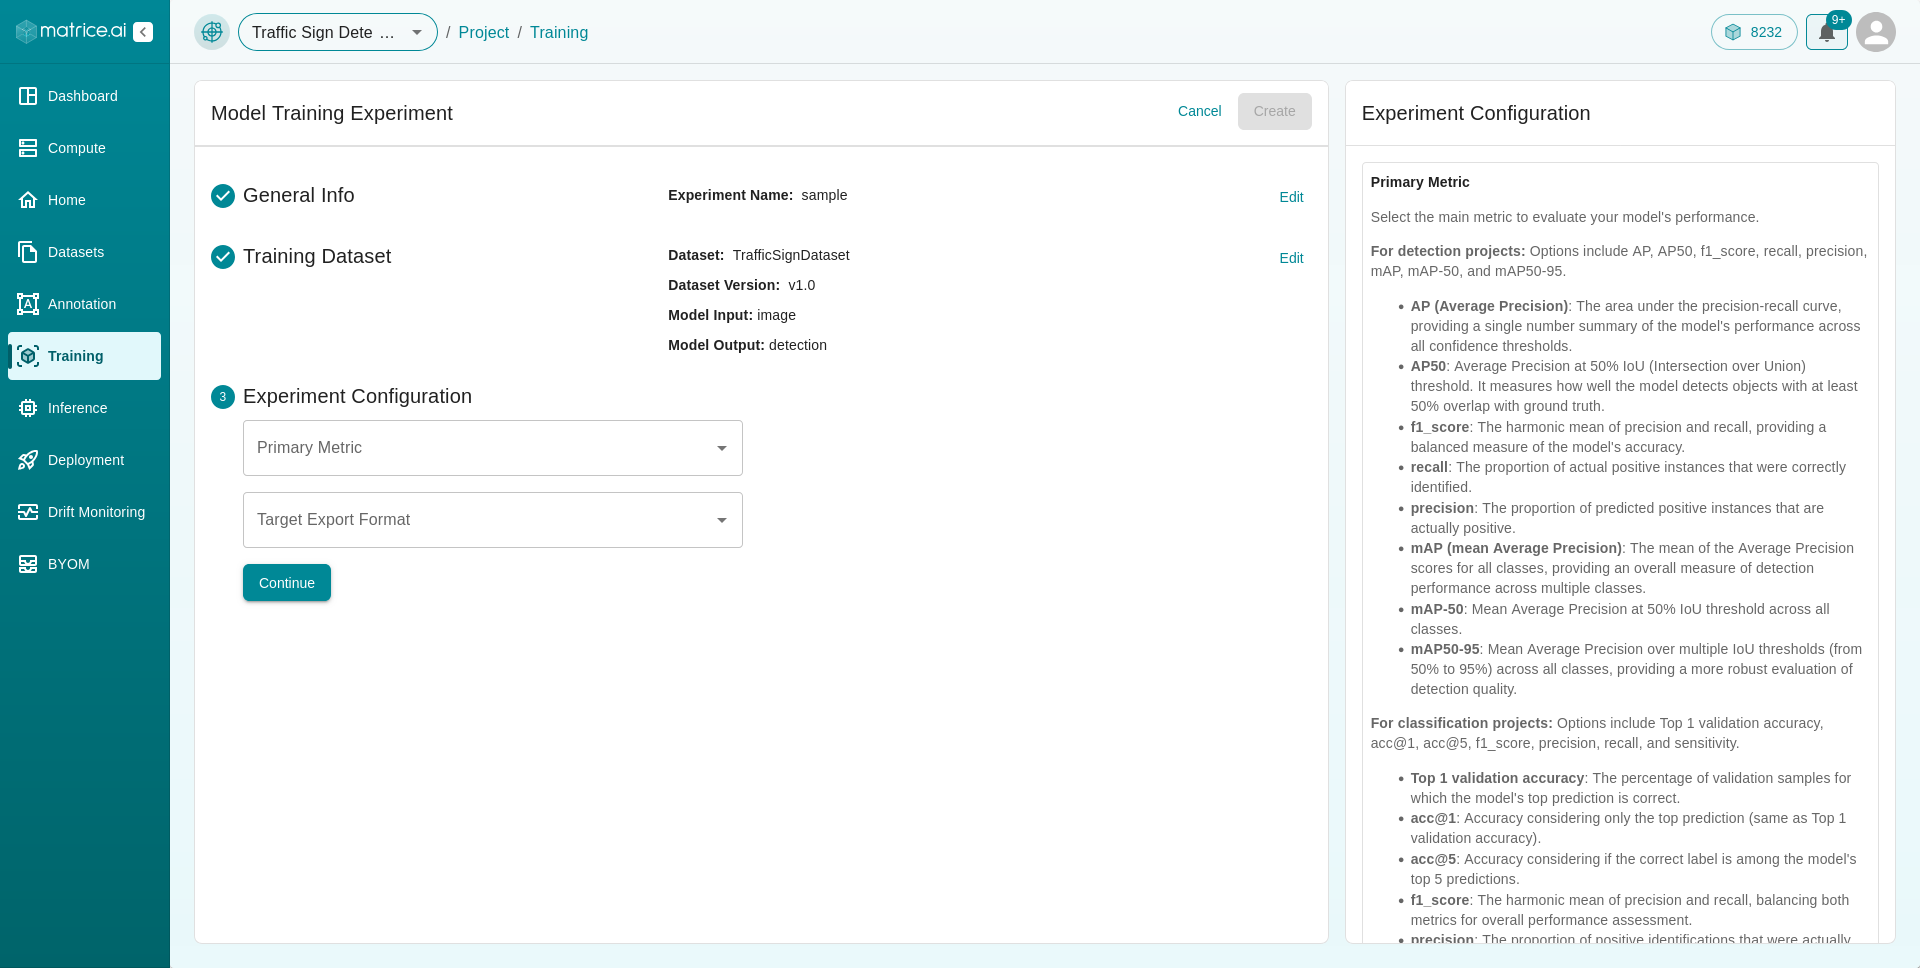
After filling in all the details, click the
Createbutton at the top of the page. You will be redirected back to the Models dashboard.
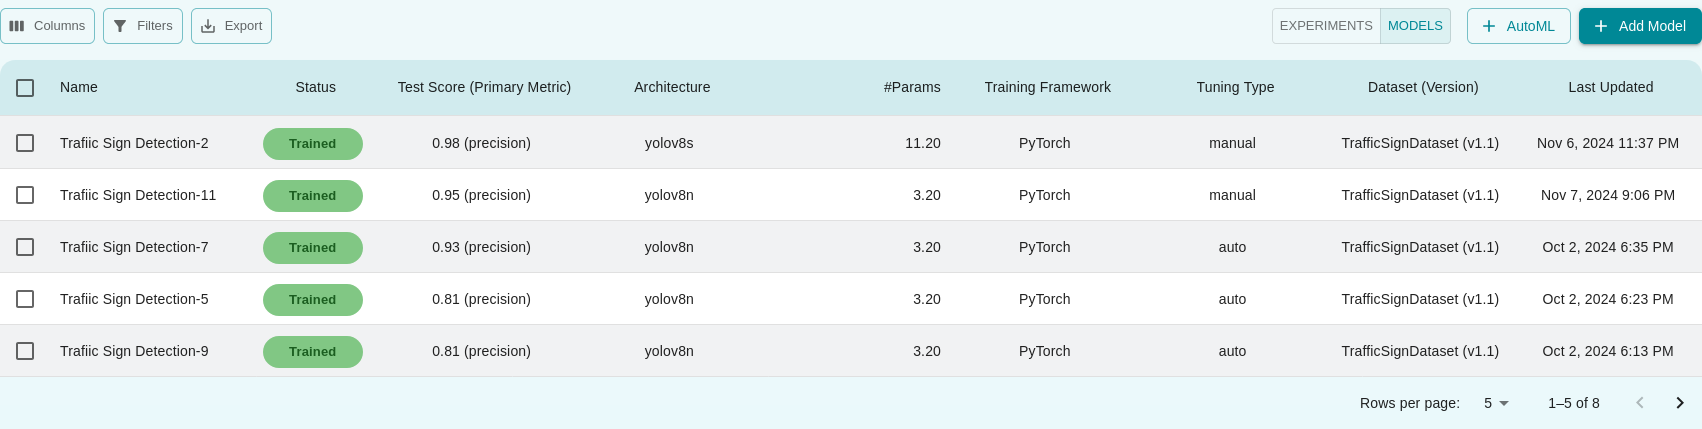
Create Model
To add models to train under this experiment, click the + button to the left of the experiment name in the experiment table. This will reveal a sub-table for models. To start training models, you can either click on the + Add Model button or the + AutoML button.
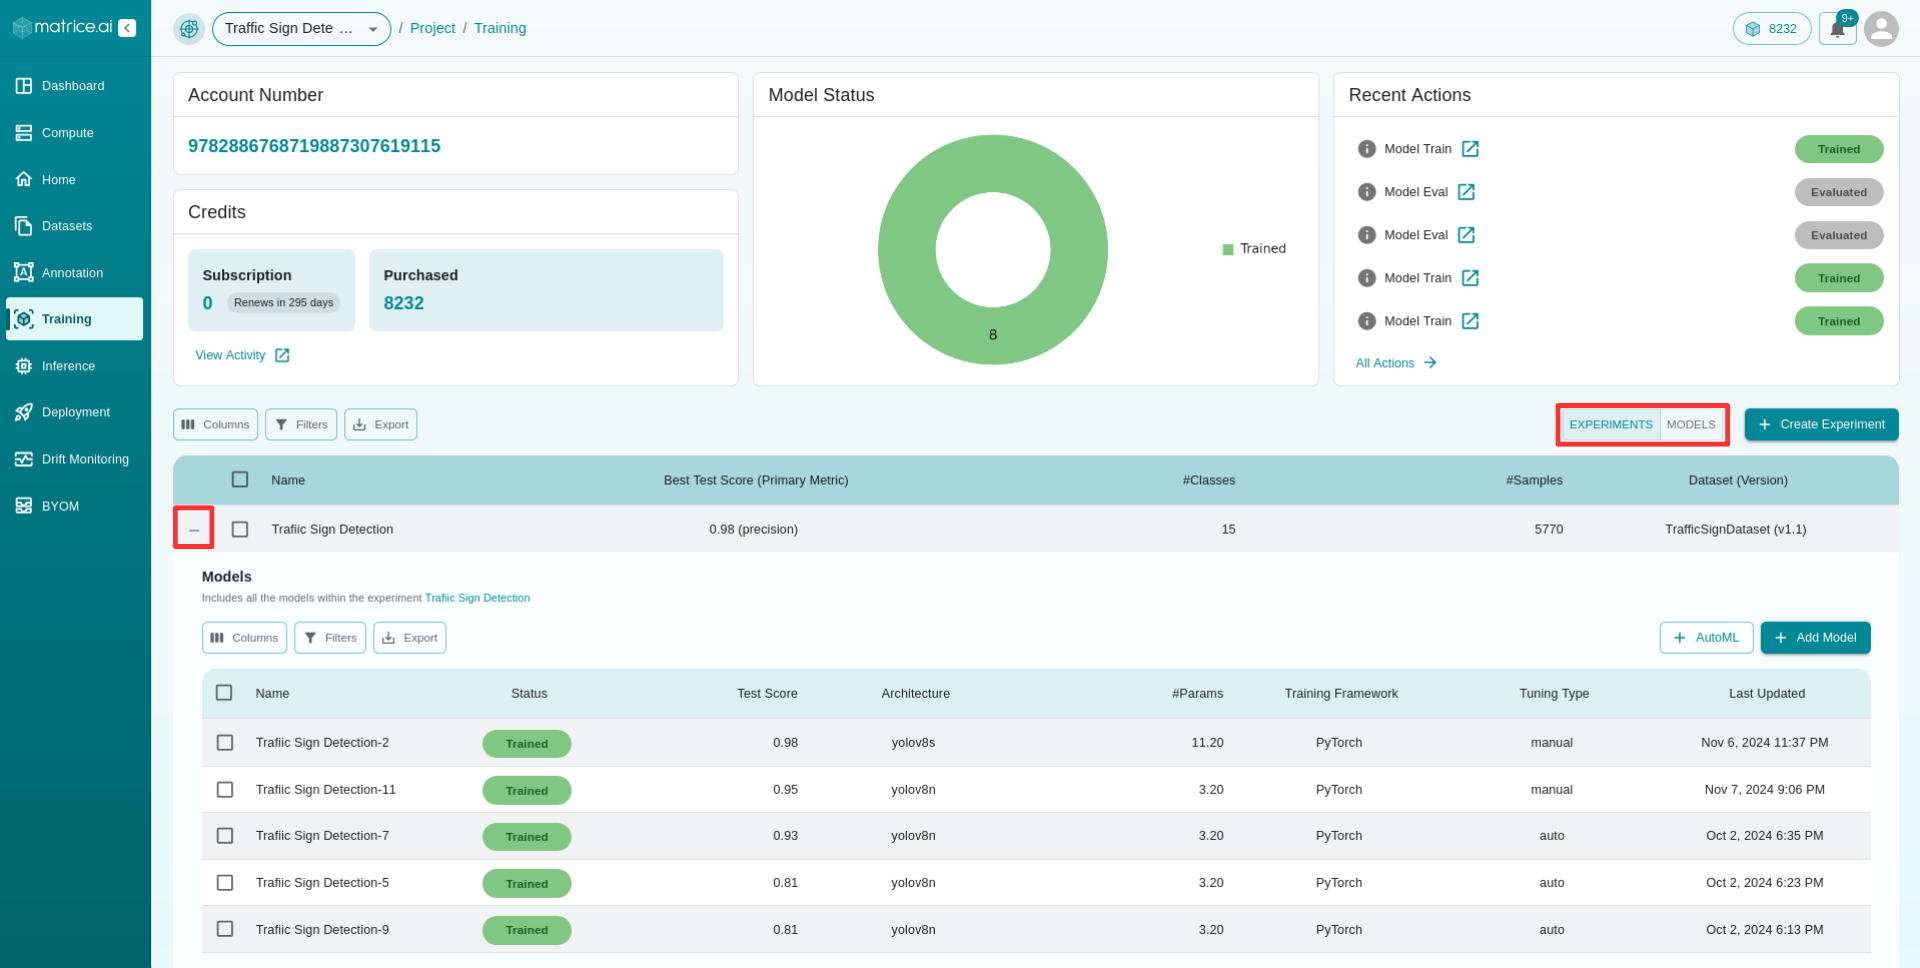
Alternatively, you can also use the toggle button to the left of Create Experiment button to toggle between experiments and models table.
+ Add Model
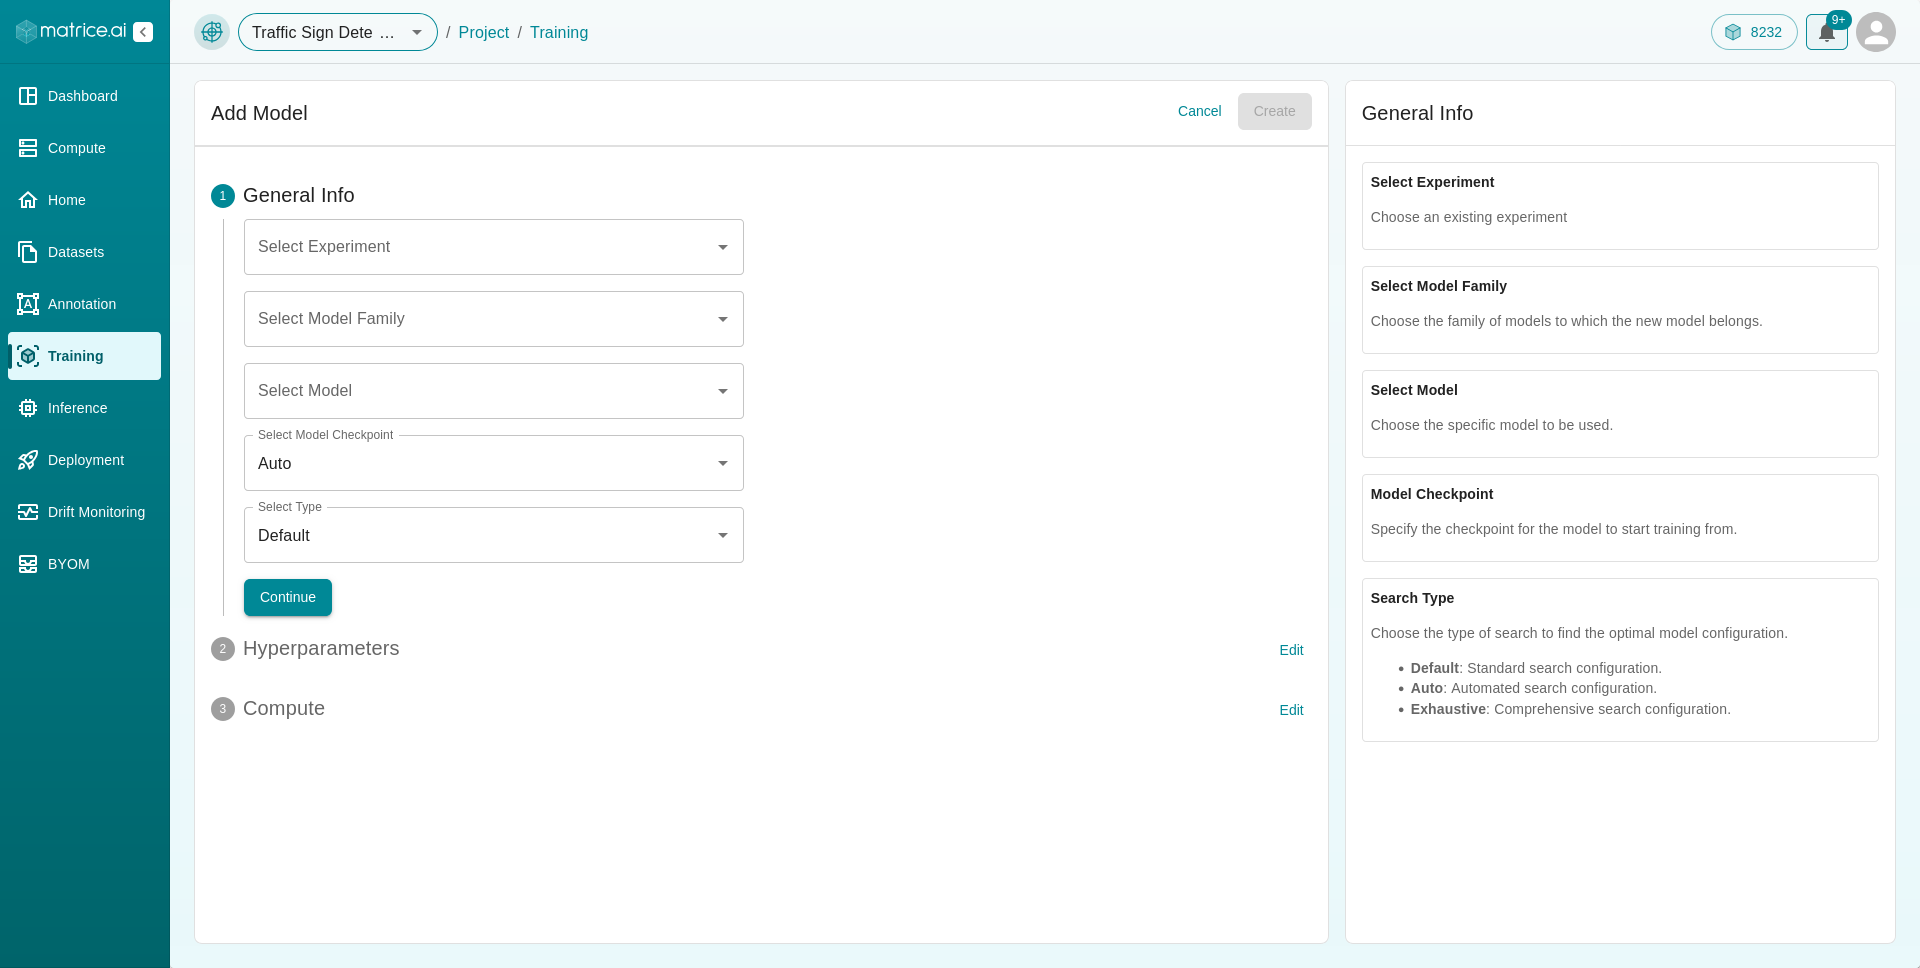
Clicking on this option allows you to manually choose the model you wish to train on the dataset. Here’s the process:
General Info:
Experiment: Select the experiment you want to add the model to.
Model Family: Choose the model family.
Model: Select the specific model.
Model Checkpoint: Choose between auto or none.
Search Type: Choose from default, auto, or exhaustive.
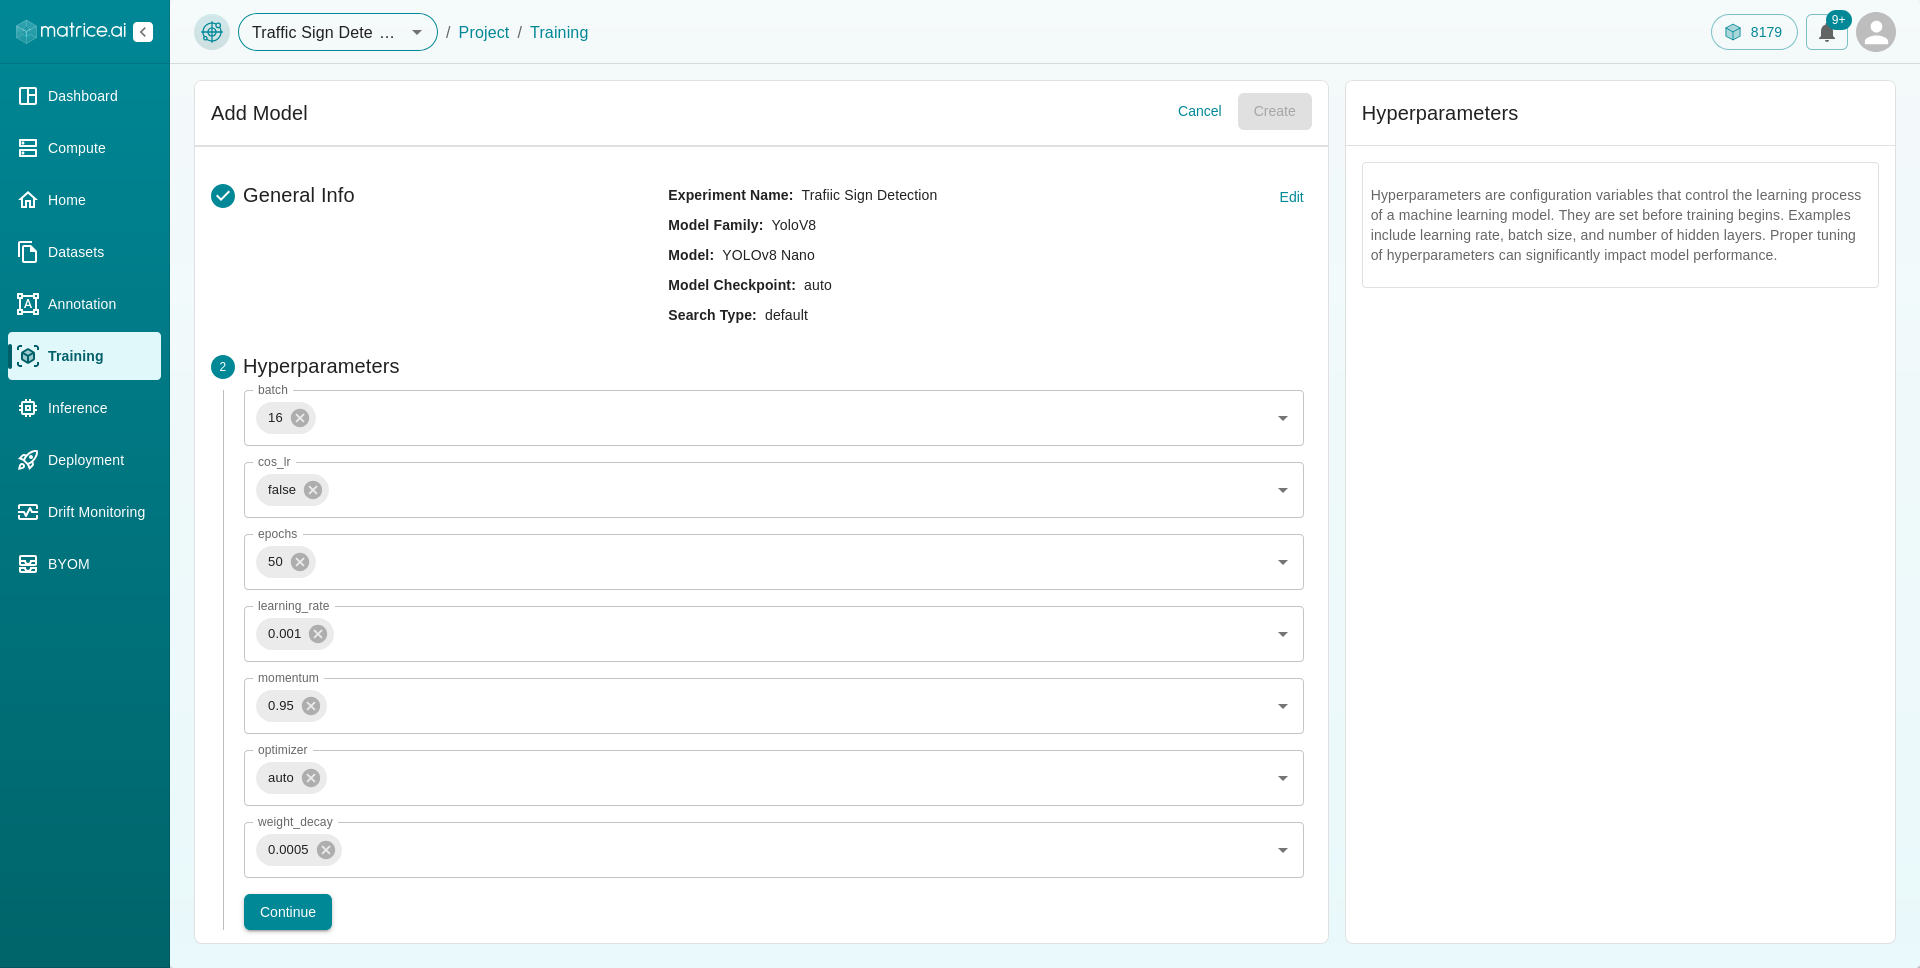
Hyperparameters: Here’s an explanation of each hyperparameter you can configure:
batch_size: The number of training samples to work through before the model’s internal parameters are updated. A smaller batch size results in more updates per epoch, potentially leading to faster convergence but with more noise. Larger batch sizes provide a more accurate estimate of the gradient but require more memory.epochs: The number of complete passes through the training dataset. Higher epochs typically lead to better performance, but it may also increase the risk of overfitting, where the model performs well on the training data but poorly on new, unseen data.learning_rate: The step size at each iteration while moving toward a minimum of the loss function. A higher learning rate might speed up training but can overshoot the minimum. A lower learning rate offers a more precise convergence but requires more iterations.lr_gamma: A factor by which the learning rate will be reduced at certain intervals, defined bylr_step_size. For example, iflr_gammais set to 0.1, the learning rate will be reduced to 10% of its value when the step is reached.lr_min: The minimum value to which the learning rate can be reduced. This prevents the learning rate from becoming too small and making the model’s progress toward convergence excessively slow.lr_scheduler: A strategy to adjust the learning rate during training. Common strategies include:StepLR: Reduces the learning rate by
lr_gammaeverylr_step_sizeepochs.ExponentialLR: Decays the learning rate by a factor of
gammaevery epoch.ReduceLROnPlateau: Reduces learning rate when a metric has stopped improving.
lr_step_size: The number of epochs between reductions in the learning rate when usingStepLRas your scheduler. For example, if set to 10, the learning rate will be reduced every 10 epochs.min_delta: The minimum change in the monitored quantity to qualify as an improvement. This is used in early stopping to determine if training should be halted if no significant improvement is observed.momentum: A parameter that helps accelerate gradients vectors in the right direction, leading to faster converging. It helps the model to navigate past small, irrelevant minima or maxima in the loss function.optimizer: The algorithm used to update the weights of the model based on the computed gradients. Common optimizers include:SGD (Stochastic Gradient Descent): The basic optimizer that performs updates on individual samples.
Adam (Adaptive Moment Estimation): A more advanced optimizer that adjusts the learning rate based on the first and second moments of the gradients.
RMSprop: An optimizer that maintains a moving average of the squared gradients to normalize the gradient.
patience: The number of epochs to wait for an improvement in validation loss before reducing the learning rate or stopping the training. This is particularly useful for early stopping to prevent overfitting.weight_decay: A regularization technique that penalizes large weights, helping to reduce overfitting by constraining the model complexity. It adds a term to the loss function based on the size of the weights, which discourages large weight values.
Note: Hyperparameters are model-dependent; some models offer full tuning options, while others have limited adjustable parameters.
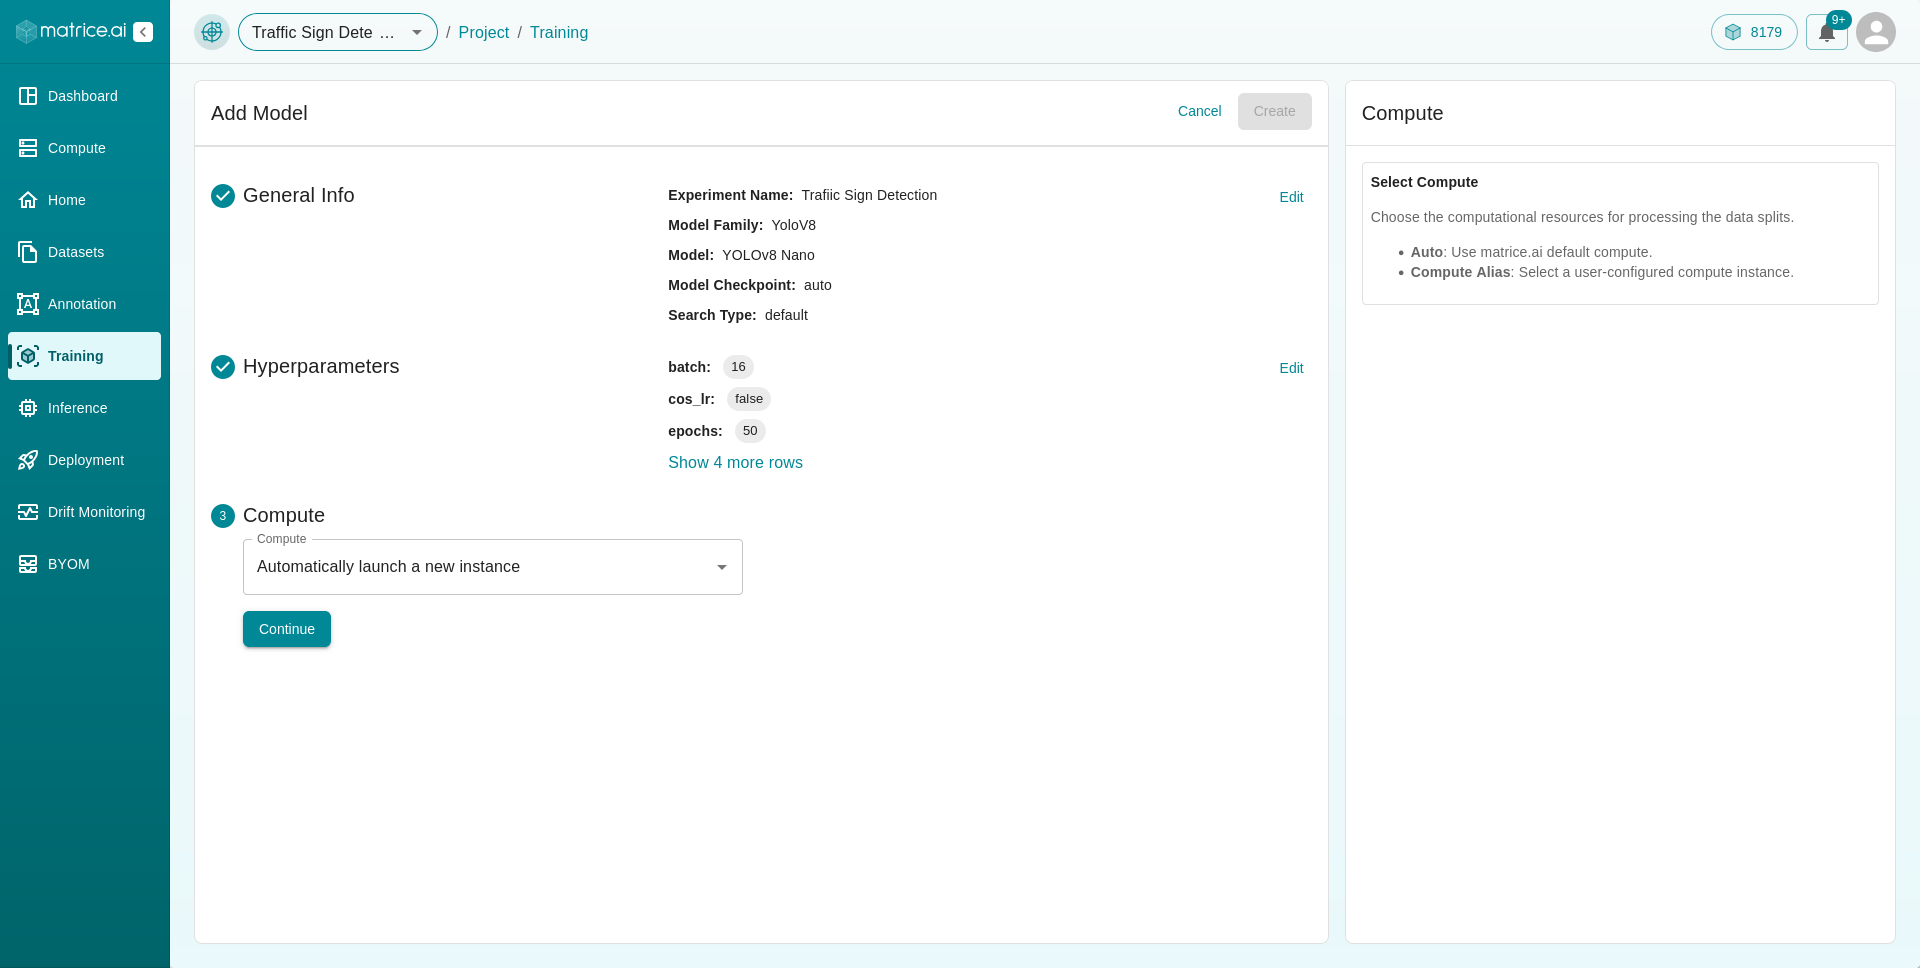
Compute: Assign a compute instance for training the model. You can leave it on auto or select a compute instance from the list of available instances.
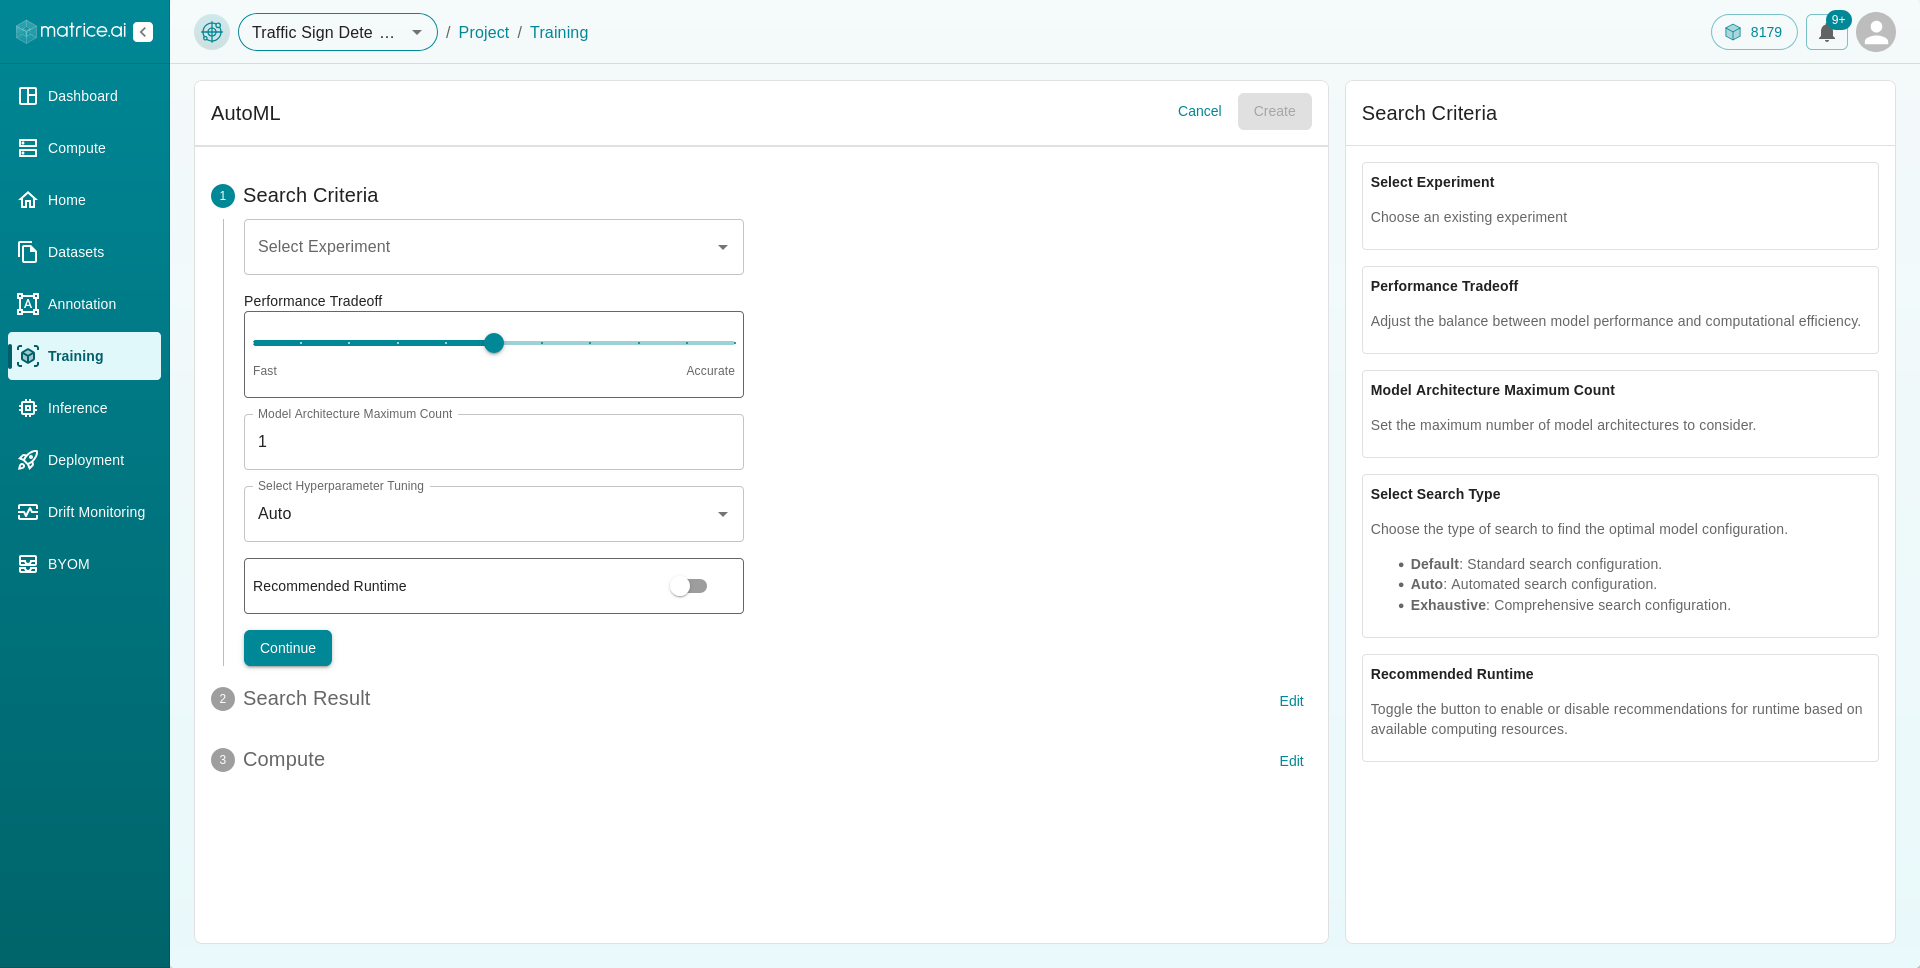
+ AutoML
Clicking on the + AutoML button reveals a form that provides a more automated approach to adding models for training. This is particularly useful for users with limited knowledge of models.
Search Criteria:
Experiment: Select the experiment.
Performance Tradeoff: Choose between speed or accuracy, indicating whether you prioritize faster inference time or more accurate models.
Model Architecture Maximum Count: Specify the maximum number of model architectures to consider.
Hyperparameter Tuning: Choose the type of search to find the optimal model configuration.
Default: Standard search configuration.Auto: Automated search configuration.Exhaustive: Comprehensive search configuration.
Recommended Runtime: Toggle the button to enable or disable recommendations for runtime based on available computing resources.
Accuracy: Accuracy measures how well a model’s predictions match the true outcomes. It is a critical metric in scenarios where the correctness of predictions is paramount.
Once all the details are filled in, click the Continue button to move to the next part.
Search Results : Based on your answers to the previous questions, our platform will then search its database for the best models suited for your application. You can click on the checkbox next to the models to add them to the training list.
Configure Hyperparameters: Click the `Configure Hyperparameters` button to adjust the hyperparameters, similar to the manual `Add Model` process.
Delete Model: Remove any model from the search results if it doesn’t fit your criteria.
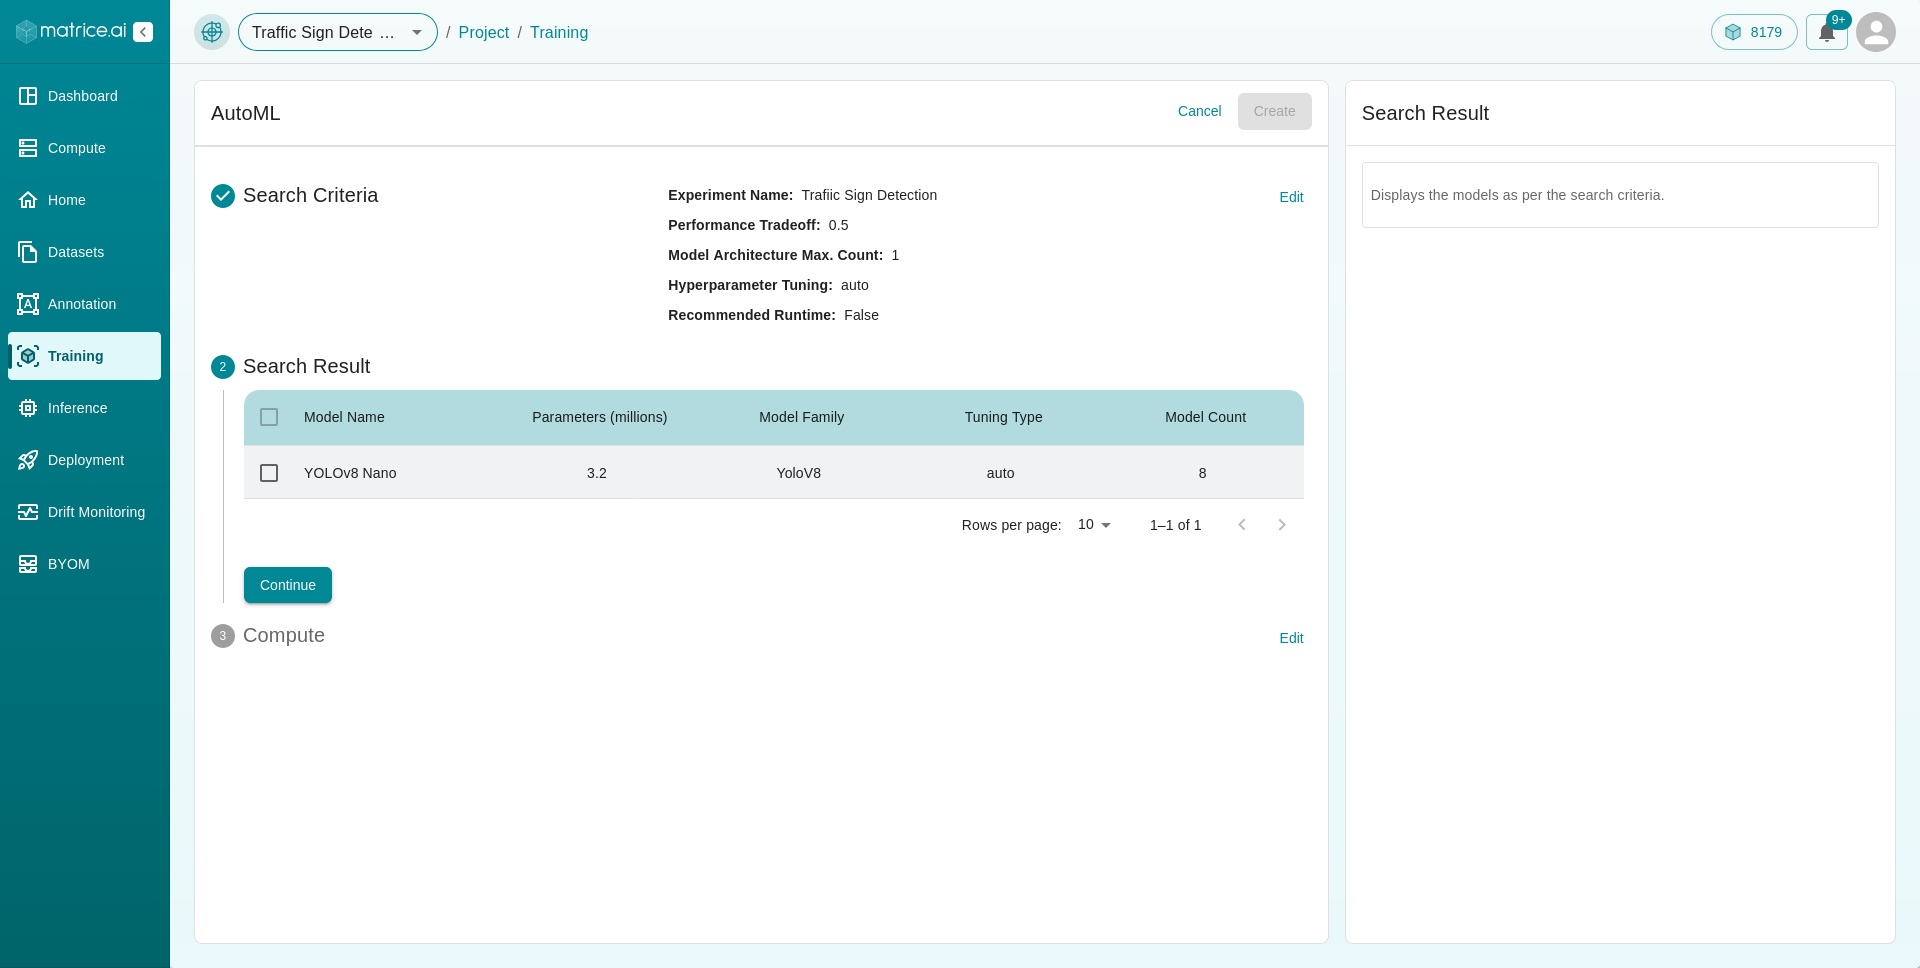
After selecting and configuring the models, clicking
Continuewill take you to the next step where you assign compute resources, similar to the process in theAdd Modelsection.Once all the details are filled in, click the
Createbutton at the top of the page. This will add the models to the training queue.
Training and Notification
After setting up your models for training, you can sit back and relax as our platform handles the model training. You will be notified via email and the website when the training is complete.