Creating Compute Instance
Creating a new compute instance on Matrice.ai is straightforward and allows users to choose between On-Demand or Dedicated compute types, depending on their project requirements. Here’s a step-by-step guide for setting up each type.
Step 1: Accessing the Compute Form
To create a new compute instance, navigate to the Compute Dashboard and click either the Add On-Demand Compute or Add Dedicated Compute button. This action opens a form where users can input necessary details to configure the instance.
Creating an On-Demand Compute Instance
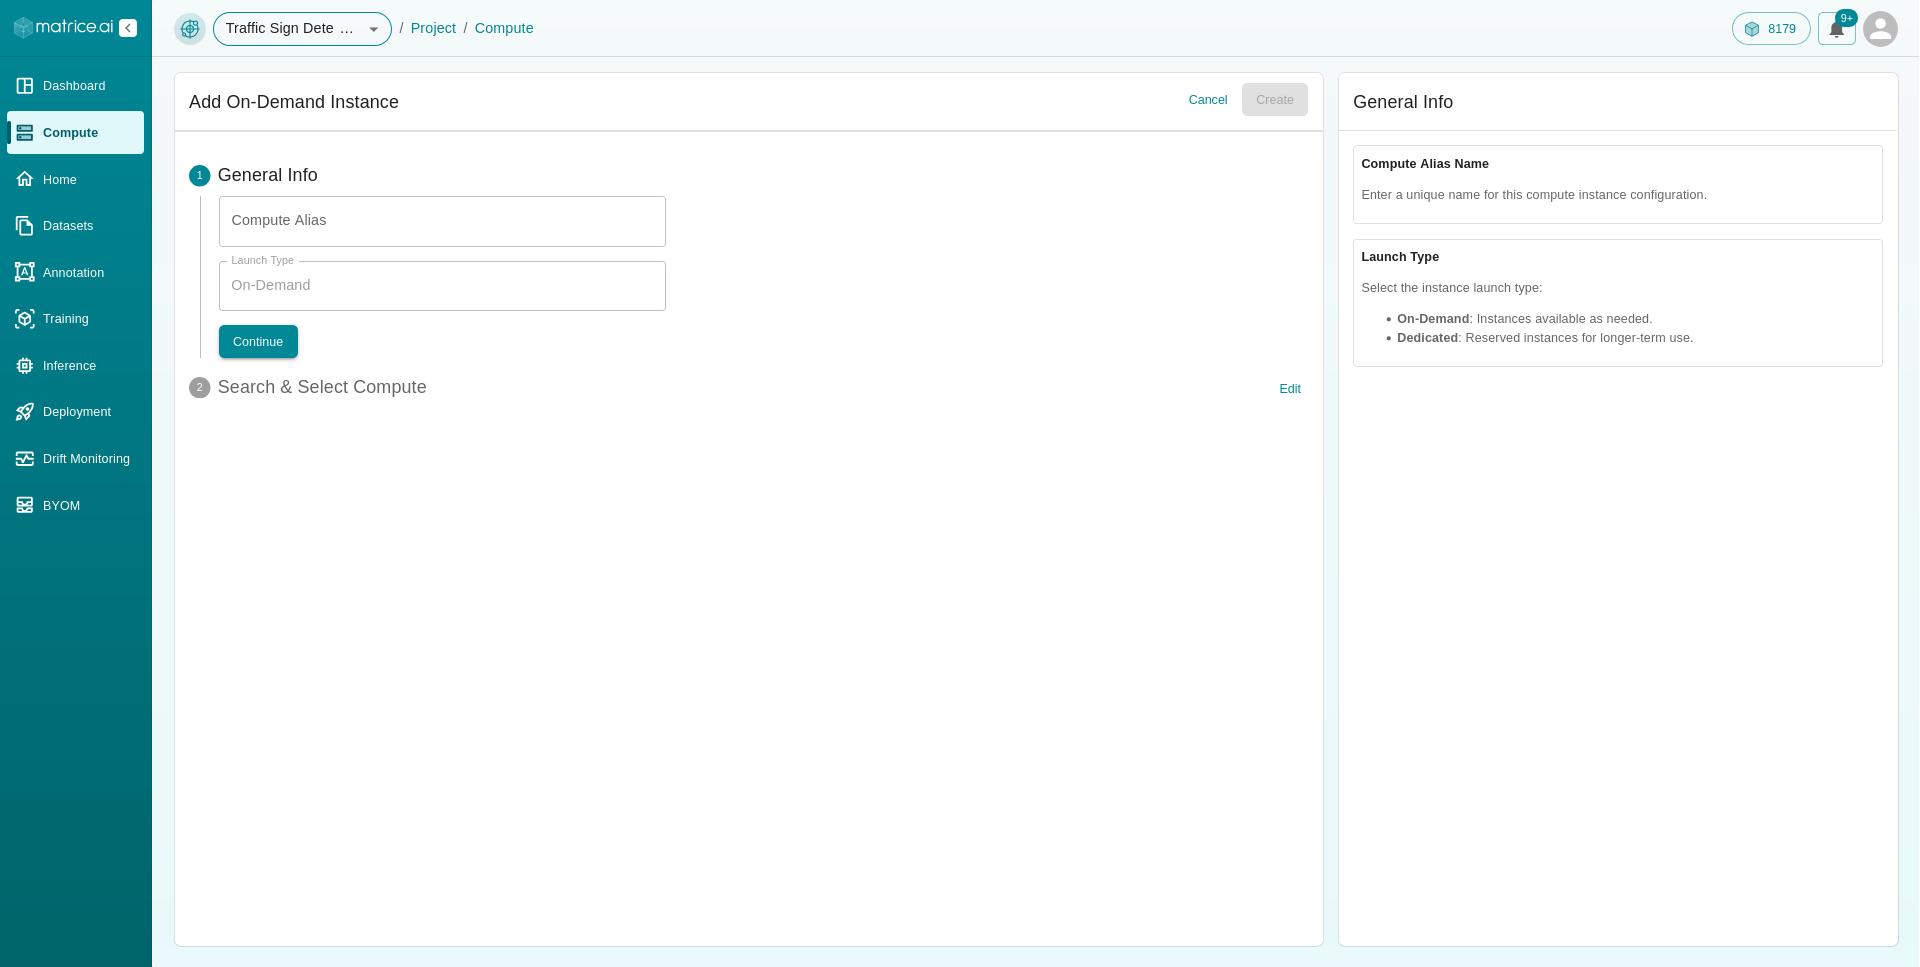
1. General Info
Compute Alias: Enter a unique name for your compute instance.
Launch Type: The field will be auto-populated as “On-Demand”.
2. Search & Select Compute
In this section, you can specify the details of your compute requirements:
Service Provider: Select from available cloud service providers, including AWS, GCP, OCI, and Lambda Labs.
GPU Type: Choose the type of GPU needed for your workload (e.g., NVIDIA V100, A10).
Price Range: Adjust the slider to set an acceptable price range per hour.
Launch Duration (Hrs): Define the expected duration for which the instance will run.
Shutdown Threshold (Sec): Specify the idle time after which the instance should automatically shut down.
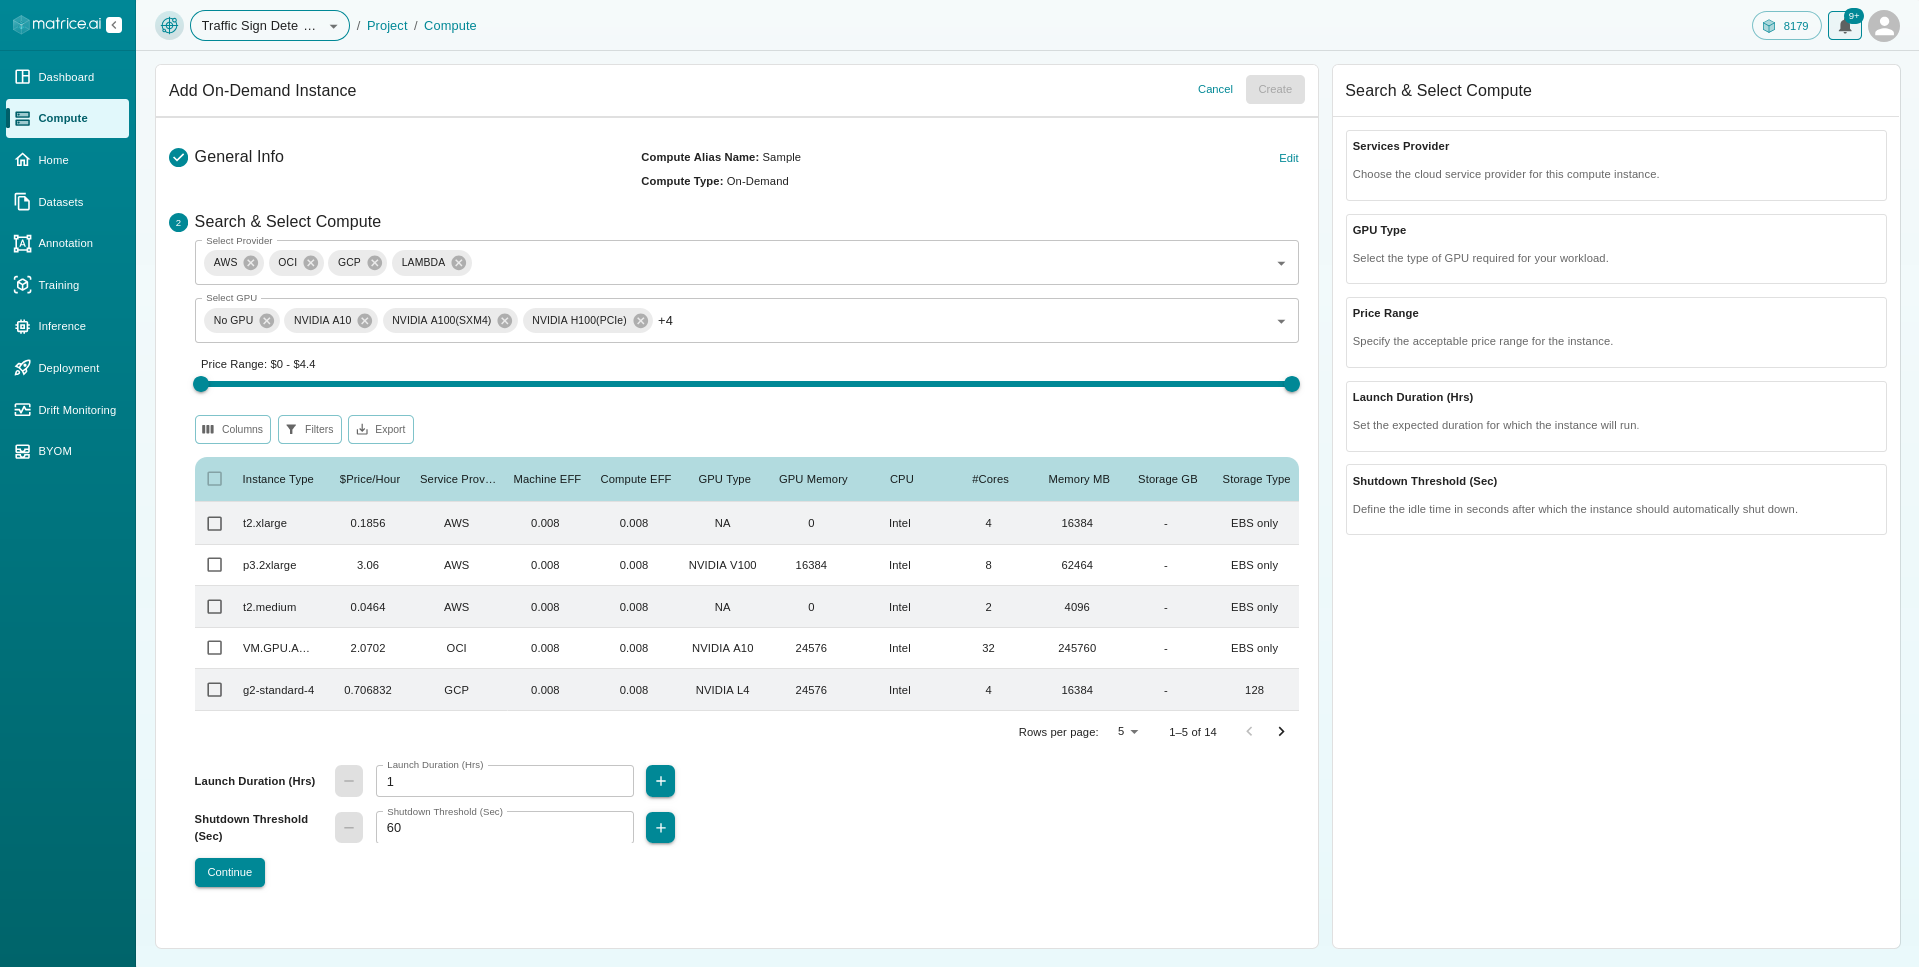
Table Details:
Instance Type: The type of compute instance.
$Price/Hour: The hourly cost.
Service Provider: The cloud provider.
Machine EFF: Efficiency rating of the instance.
GPU Type: Type of GPU available.
GPU Memory: The memory capacity of the GPU.
CPU: CPU type.
#Cores: Number of CPU cores.
Memory MB: System RAM in megabytes.
Storage GB: Disk storage in gigabytes.
Storage Type: Type of storage (e.g., SSD, EBS only).
After selecting the desired instance, click Continue to finalize the setup.
Creating a Dedicated Compute Instance
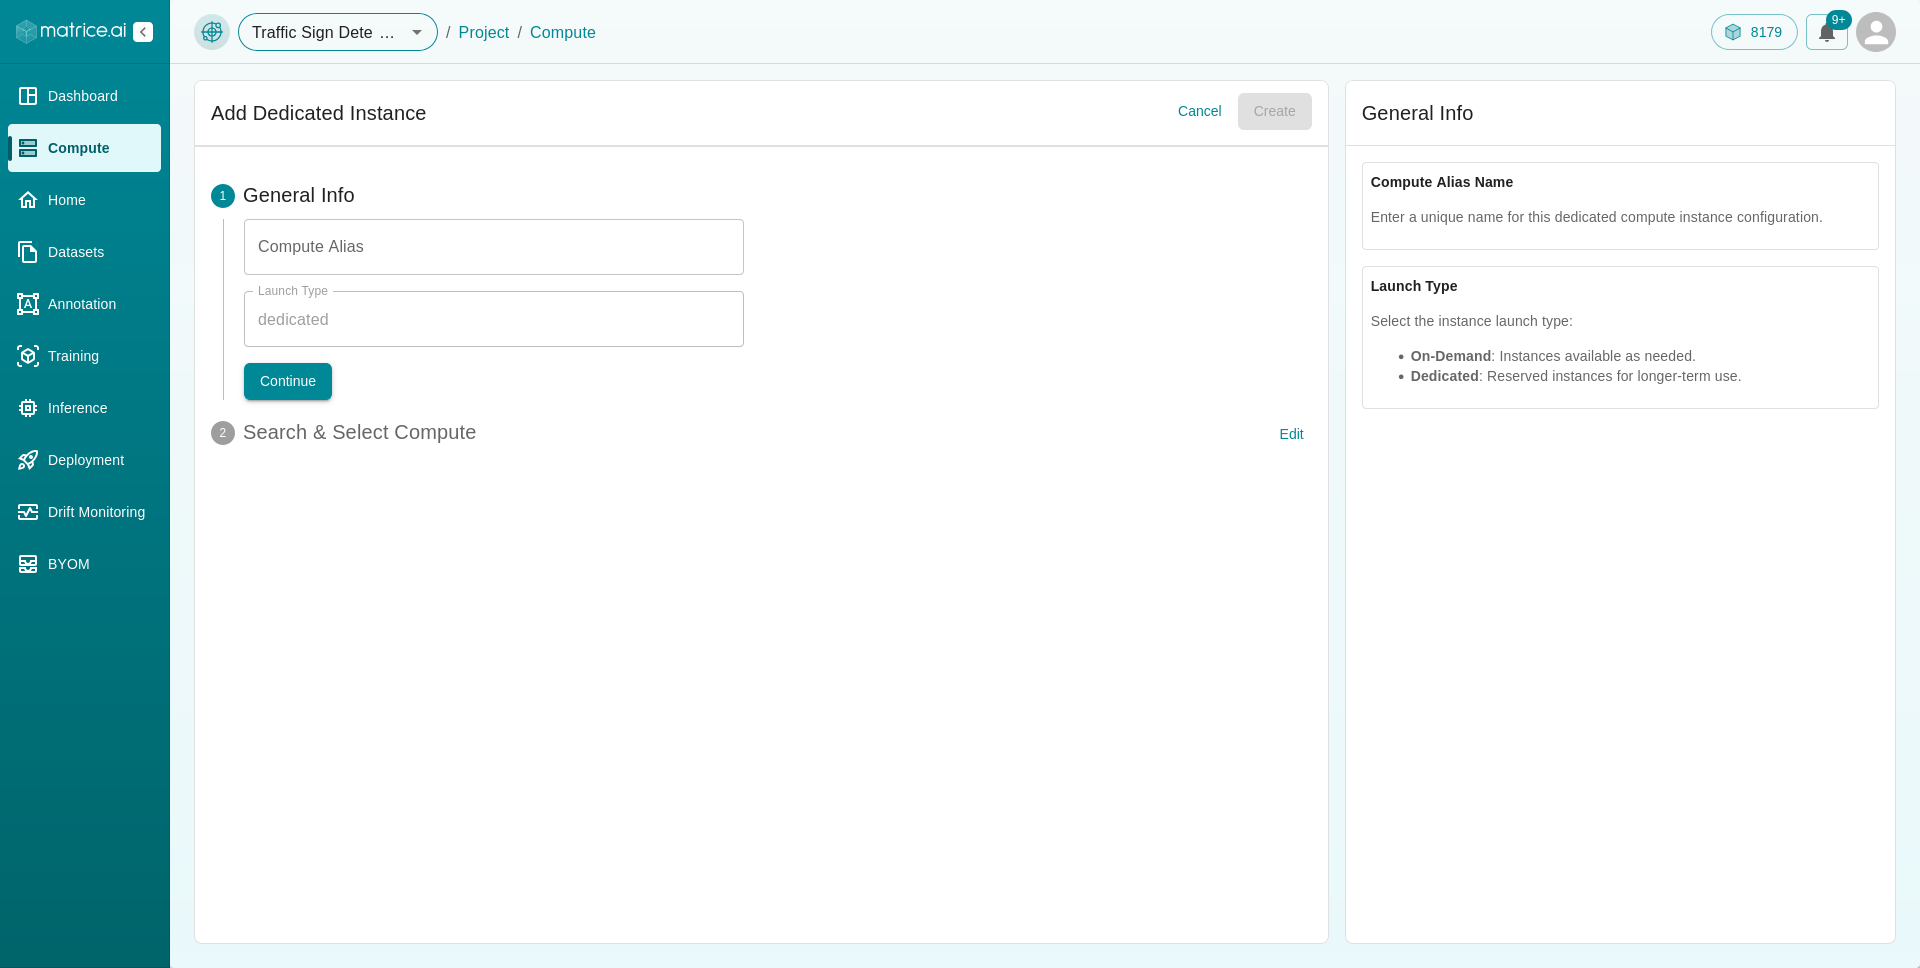
1. General Info
Compute Alias: Provide a unique alias for the compute instance.
Launch Type: The field will be pre-set as “Dedicated”.
2. Search & Select Compute
Specify the configuration details for your dedicated instance:
Service Provider: Choose your preferred cloud provider (e.g., AWS, GCP, OCI, Lambda Labs).
GPU Type: Select the GPU model suited for your workload.
Price Range: Set a price range per hour using the slider.
Select Tenure (months): Choose the commitment period for the instance.
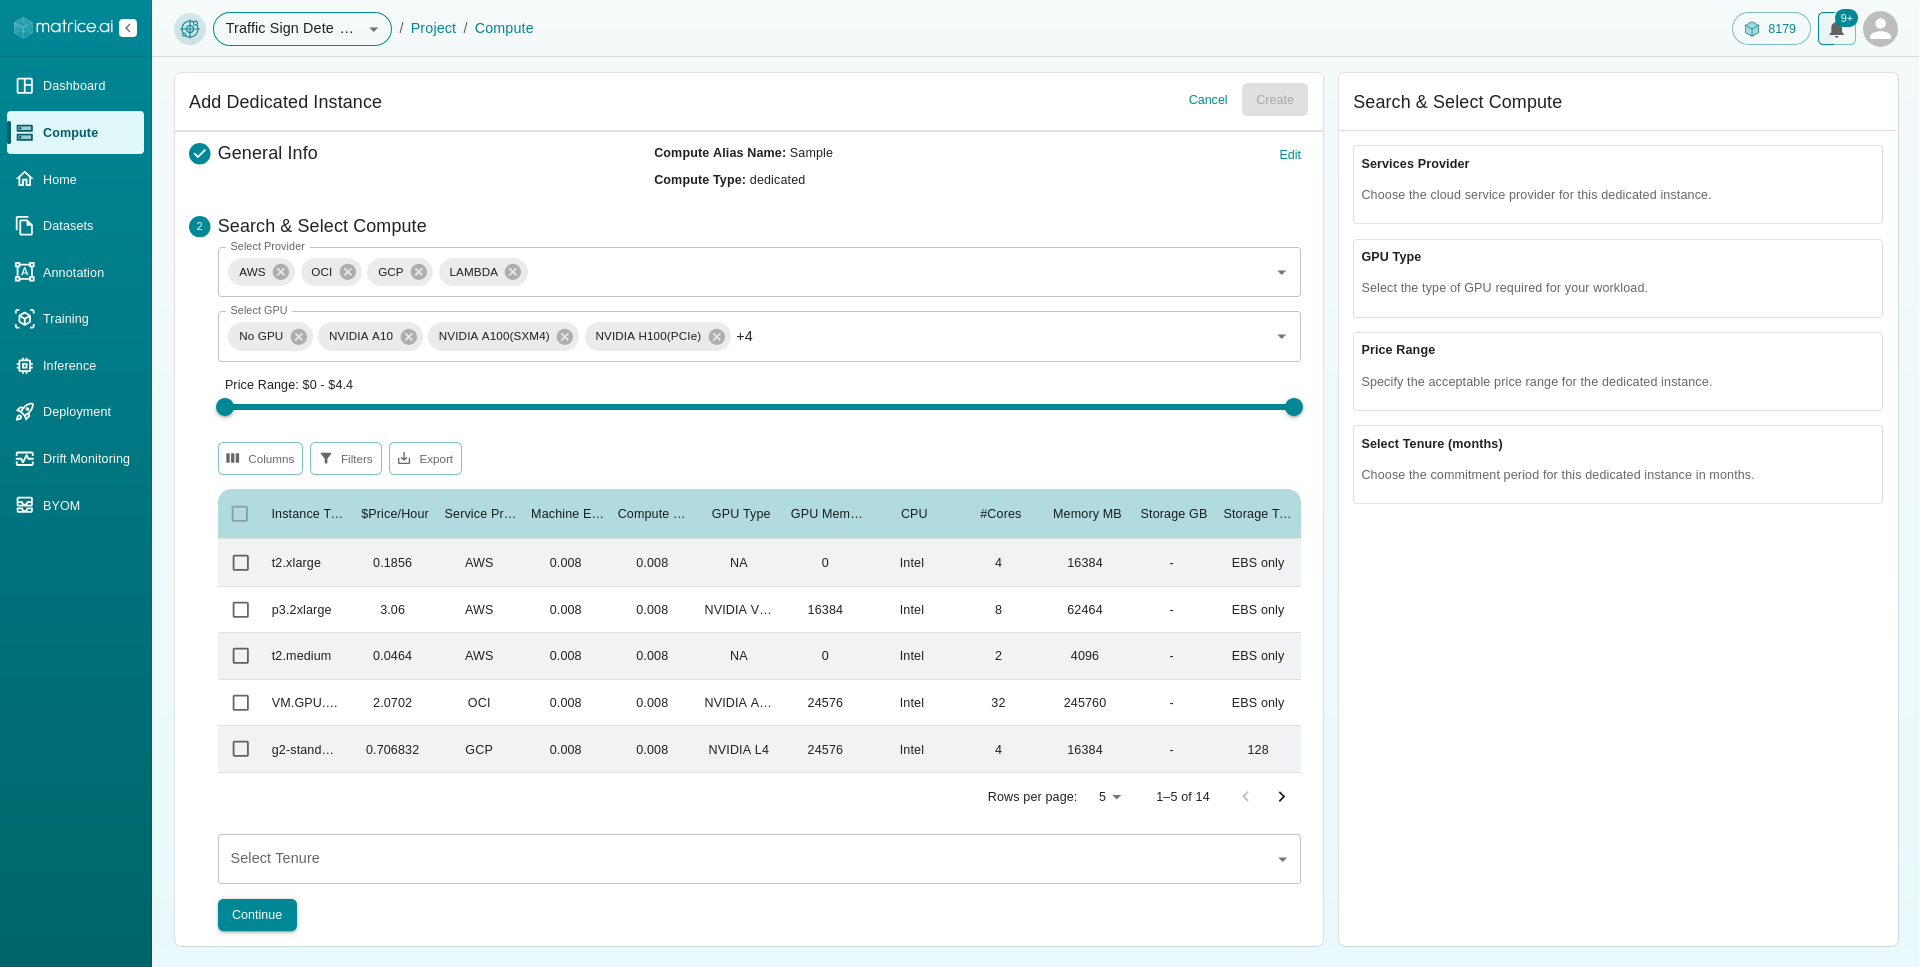
Table Details:
Instance Type: The instance type.
$Price/Hour: Hourly rate.
Service Provider: Cloud service provider.
Machine EFF: Machine efficiency.
GPU Type: Available GPU type.
GPU Memory: GPU memory size.
CPU: CPU type.
#Cores: Number of CPU cores.
Memory MB: Total system RAM in megabytes.
Storage GB: Available storage space.
Storage Type: Type of storage.
Select your preferred instance and click Continue to proceed.
Finalizing the Setup
Once all fields are completed, review the information and click Create to launch the instance. Your compute instance will be ready for use, and you can track its status and manage it through the Compute Dashboard.