How to Upload a Dataset
Using Create Dataset
To upload a new dataset, click the Create Dataset button located in the top-right corner of the table section of your dashboard. This will open a form where you need to provide the required details:
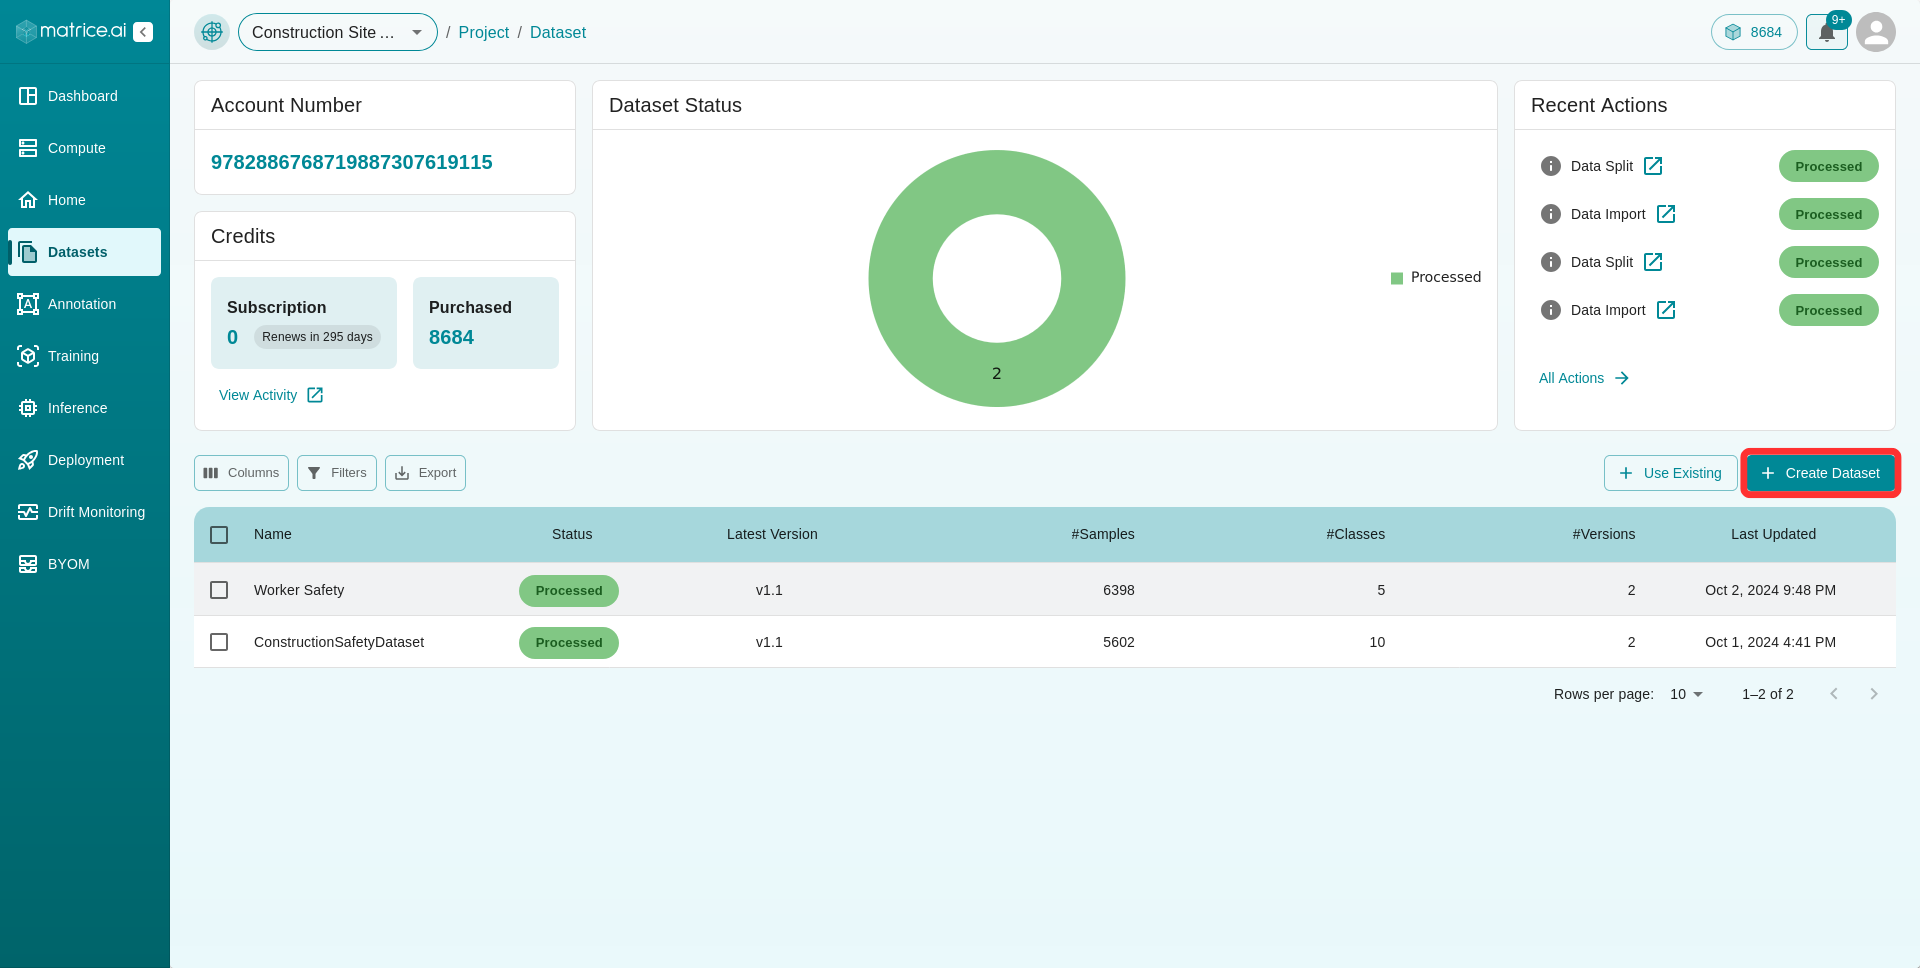

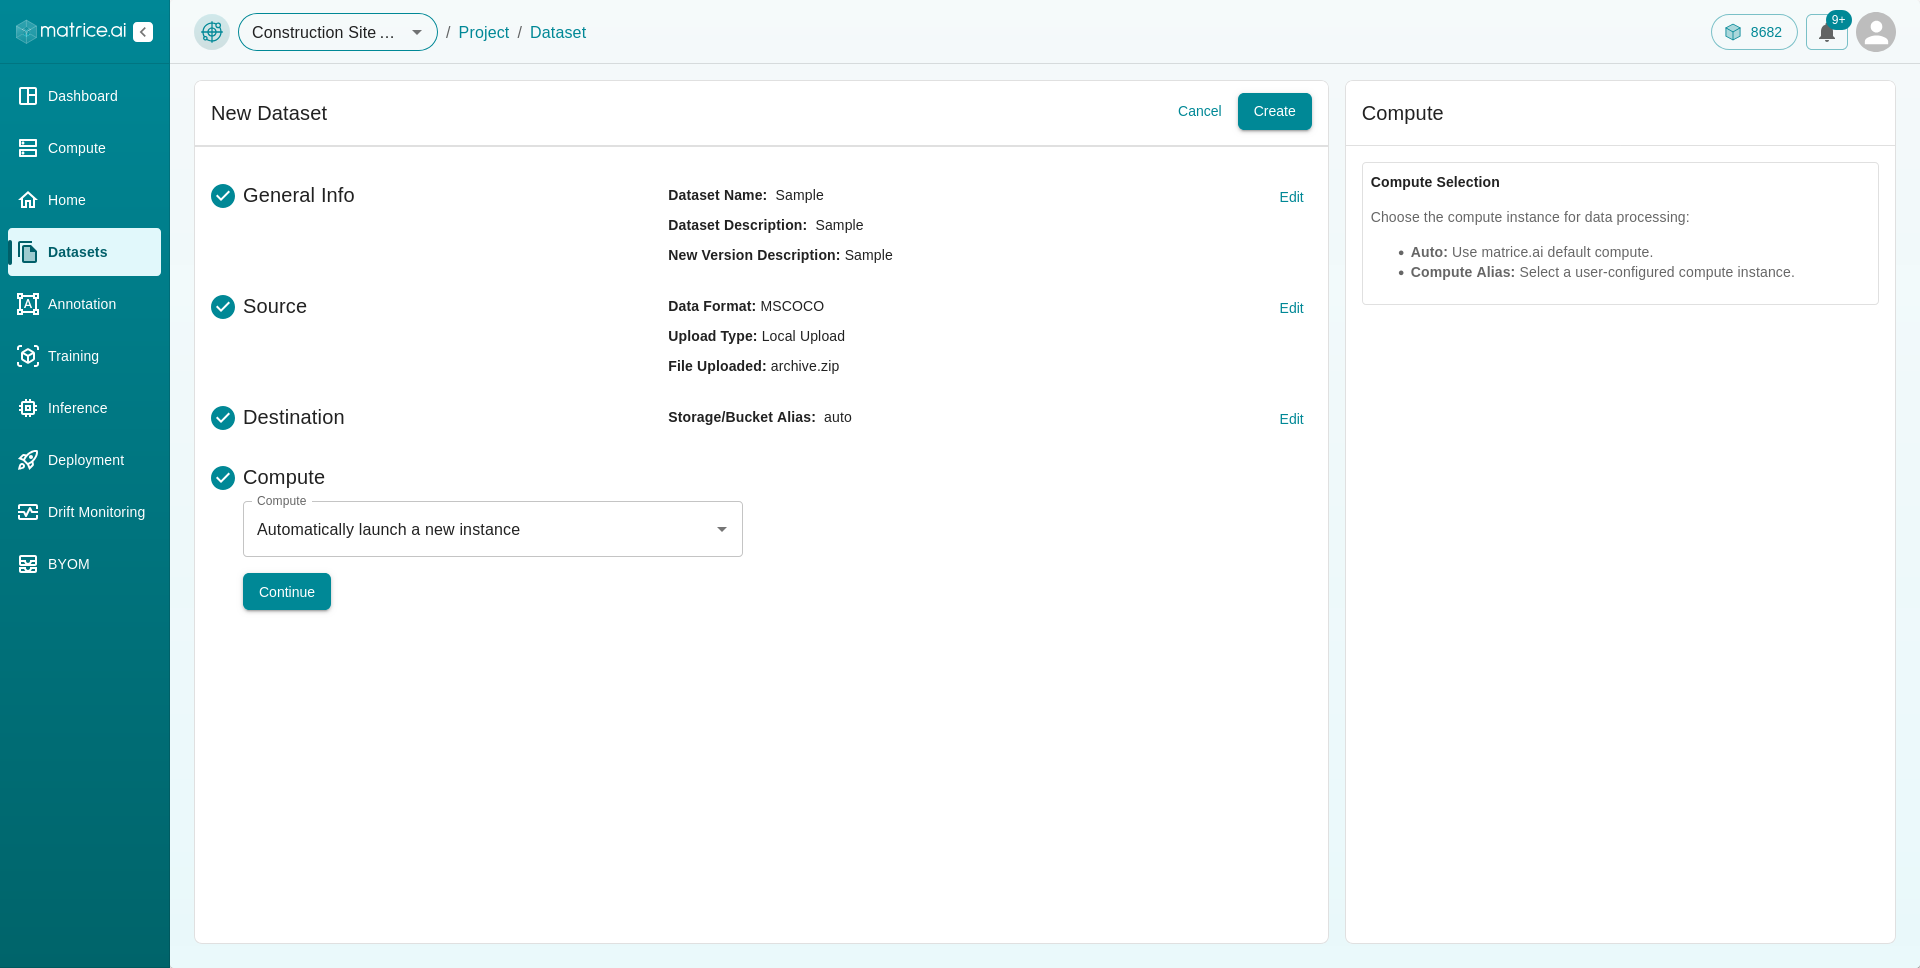
Step 1: General Info
Dataset Name : Enter a unique name for your dataset.
Dataset Description : Provide a brief description of the dataset, including its purpose and content.
Version Description : Specify details about this version of the dataset (e.g., “v1.0: Initial upload with 10,000 images”).

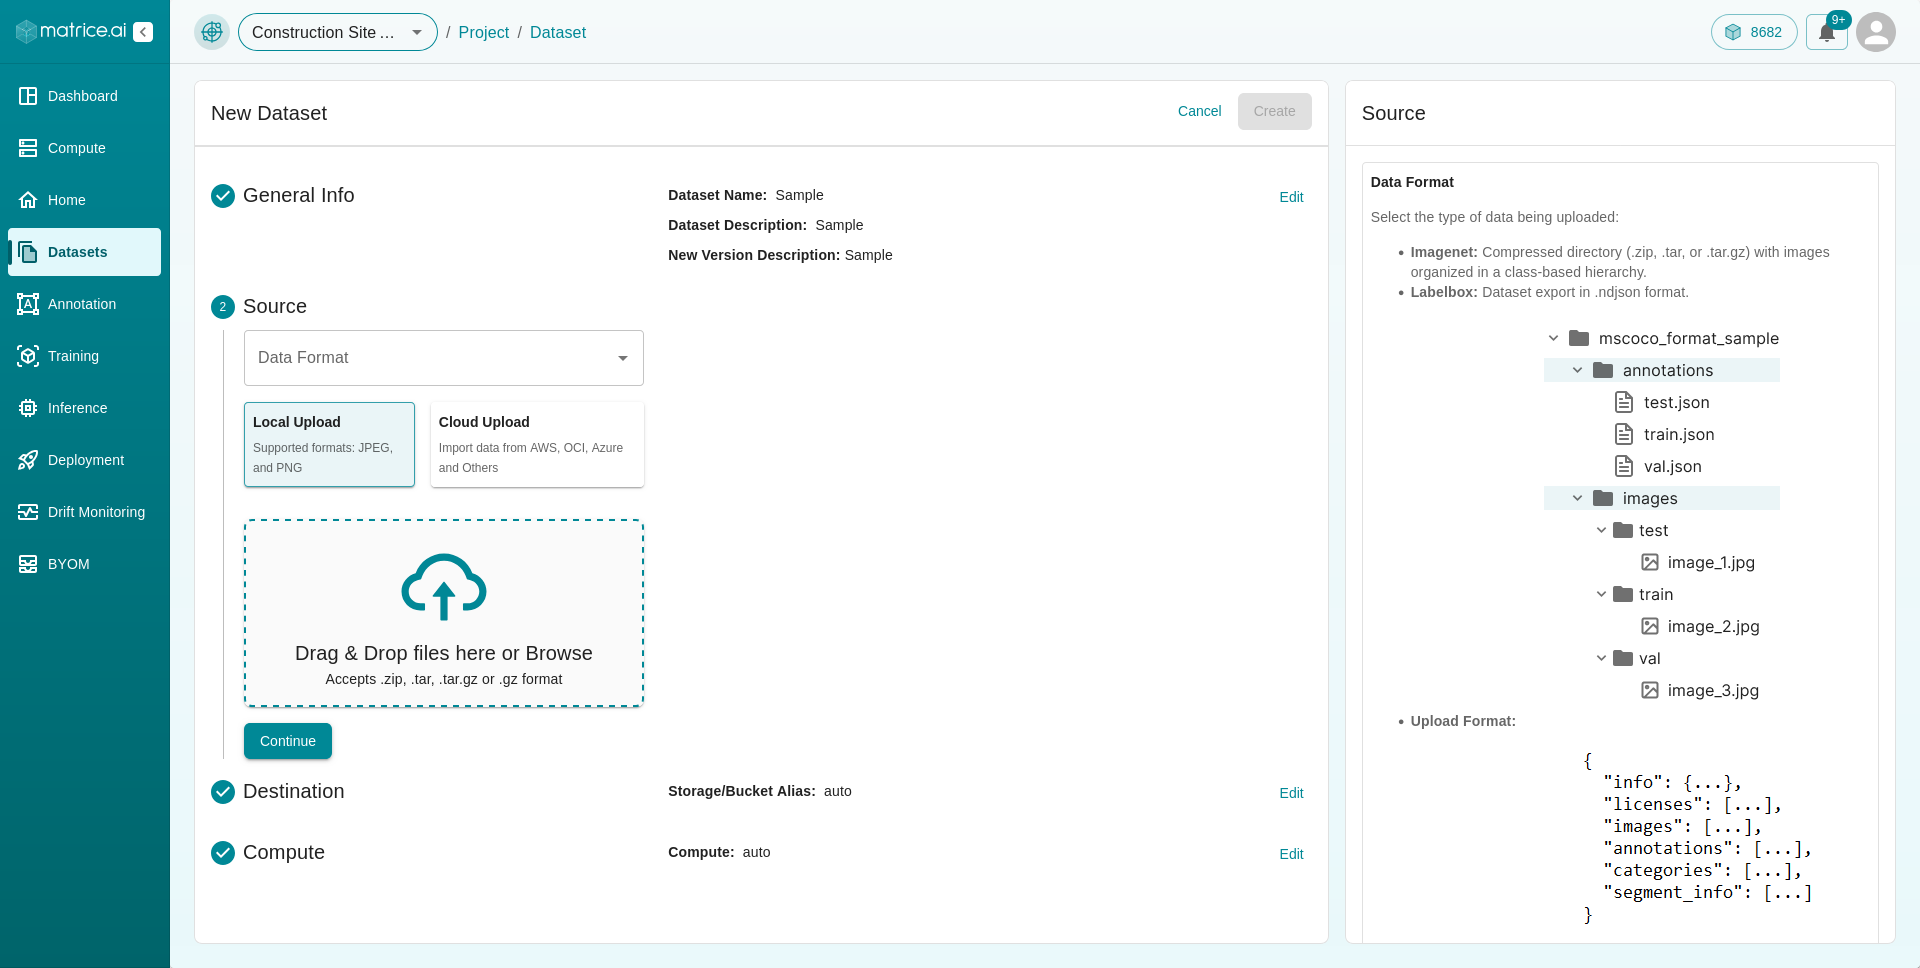
Step 2: Source
Data Format
Select the format of the dataset you are uploading. Supported formats include ImageNet, LabelBox and MSCOCO.
Upload Type:
Local Upload:
Upload a dataset directly from your local machine and specify the format of your dataset.
You can either drag and drop the dataset file or browse your file system to select it.
Supported file formats include
.zip,.tar,.gz, and.tar.gz.
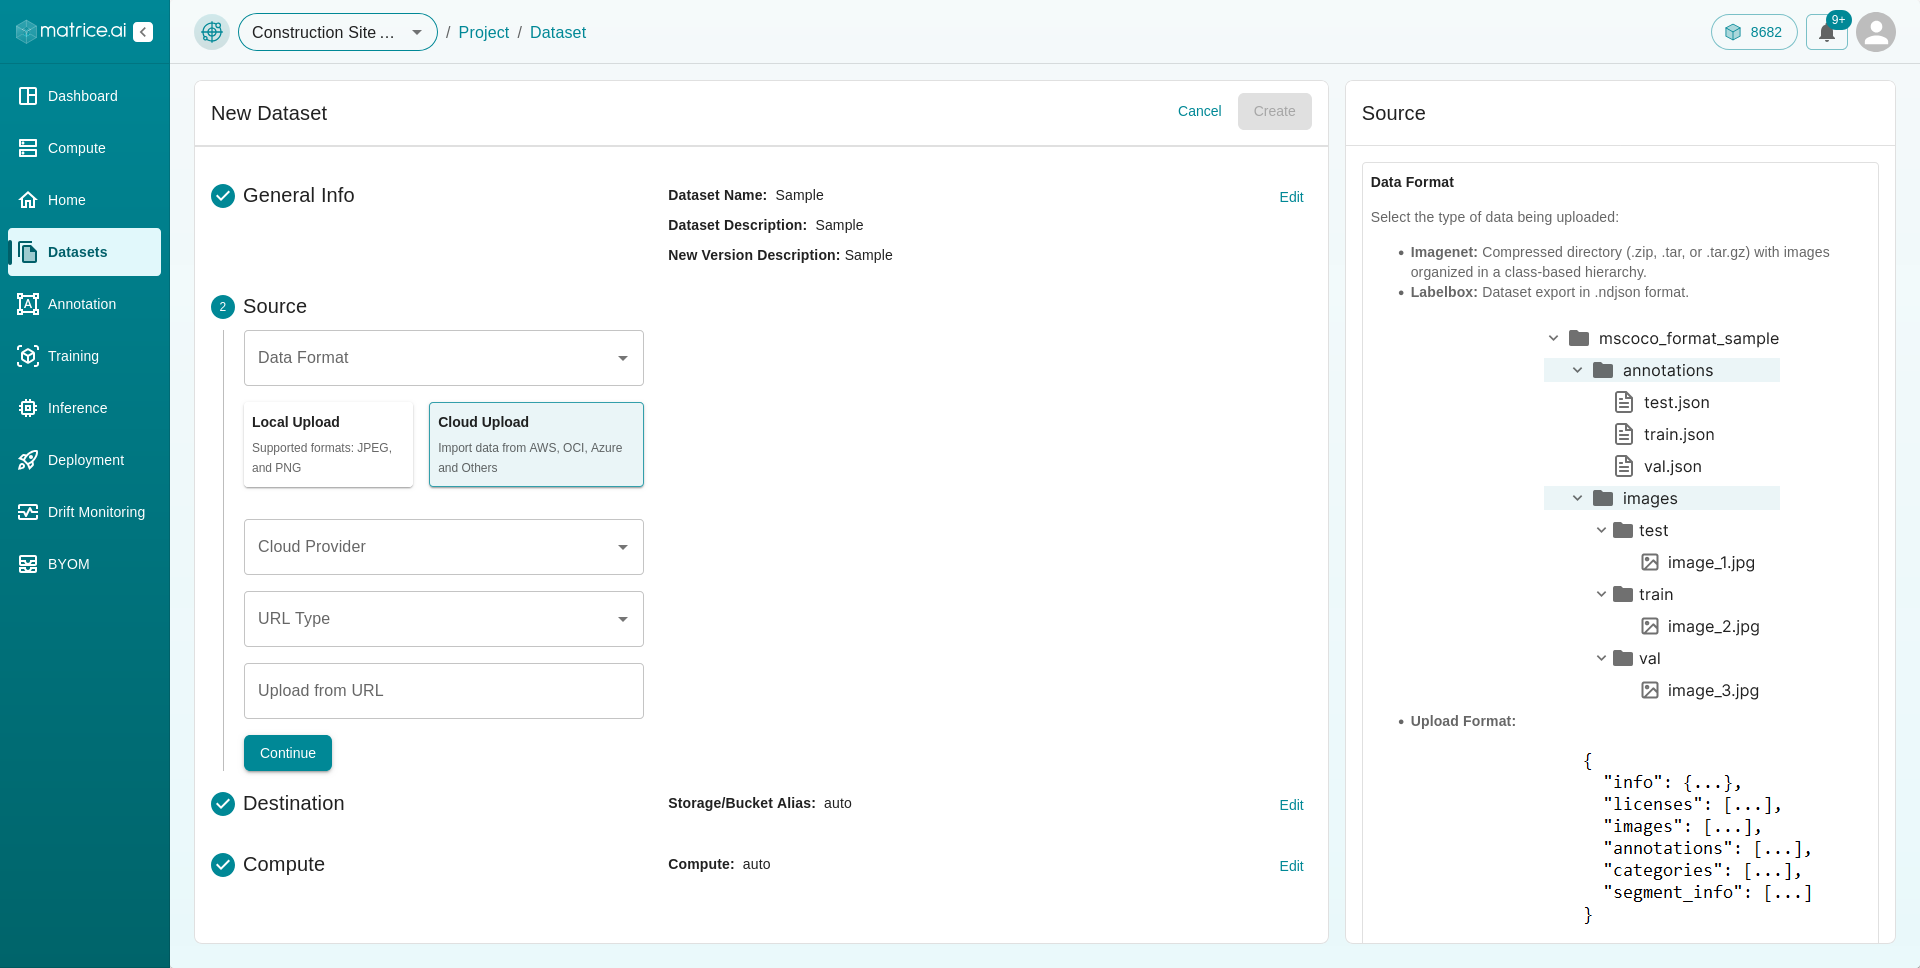
Cloud Upload:
Upload datasets stored in a cloud service provider (e.g., AWS, OCI, or GCP).
Provide the URL of the cloud storage where your dataset is hosted and specify the URL type:
Public URL: A publicly accessible URL that does not require authentication.
Private (Pre-signed): A URL with temporary, time-limited access generated by the cloud provider.
Private (using credentials): A URL requiring authentication. You must upload the necessary credentials (e.g., access keys or tokens) for the platform to access and process your dataset.
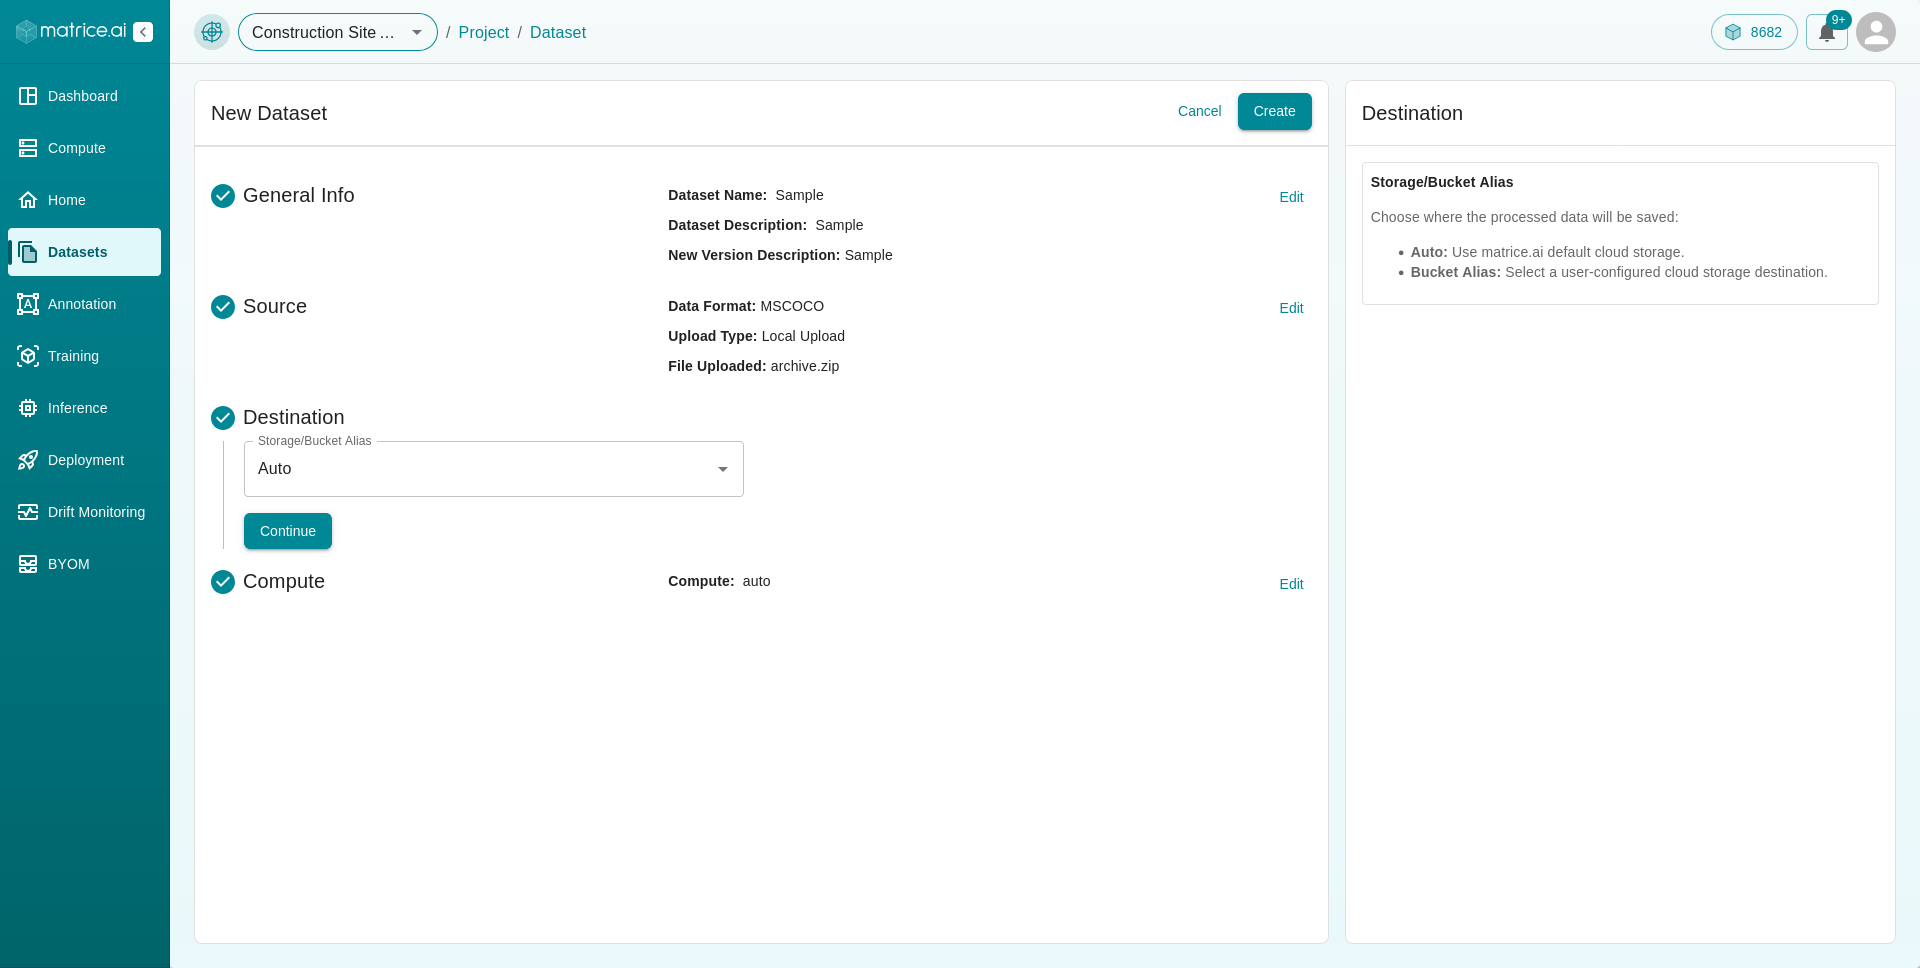
Step 3: Destination
Specify where the processed data will be saved. You can either:
Auto : Use the default Matrice.ai cloud storage.
Custom Bucket Alias : Provide a custom bucket alias for your cloud storage destination.
Step 4: Compute
Choose the compute instance that will be used for data processing. You can:
Auto : Automatically assign a compute instance.
Custom Compute Instance : Select a specific compute instance if needed.
Once you’ve completed all the steps, click the Submit button to begin uploading and processing your dataset. A progress bar will appear, allowing you to monitor the upload status. Once completed, your dataset will be available in the dashboard for further processing and training.
For more details, refer to the Dataset Management Guide to explore advanced options and best practices for handling datasets on our platform.
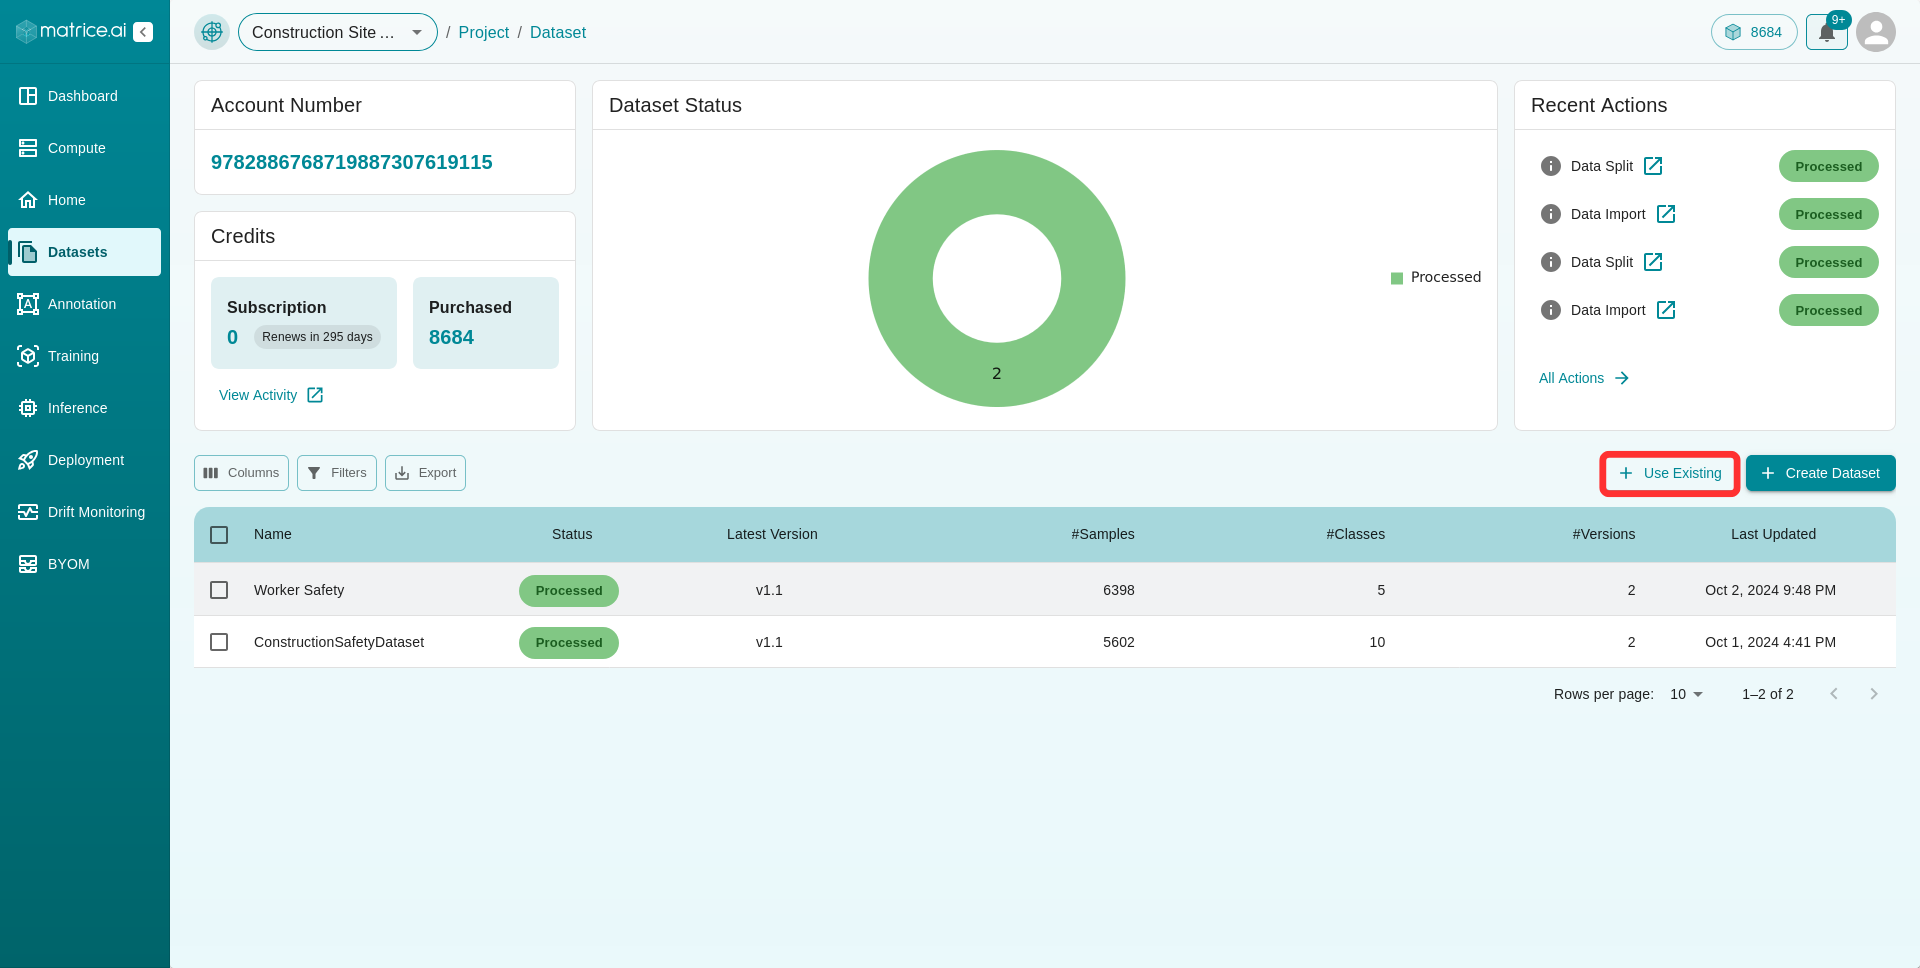
How to Upload a Dataset Using Existing Data
In addition to creating a new dataset, Matrice.ai allows you to build a dataset from an existing one. Follow the steps below to create a dataset using the Use Existing method:
Step 1: Access the Create Dataset Page
Navigate to the Dataset section of your project.
Click the Create Dataset button located at the top-right corner of the dashboard.

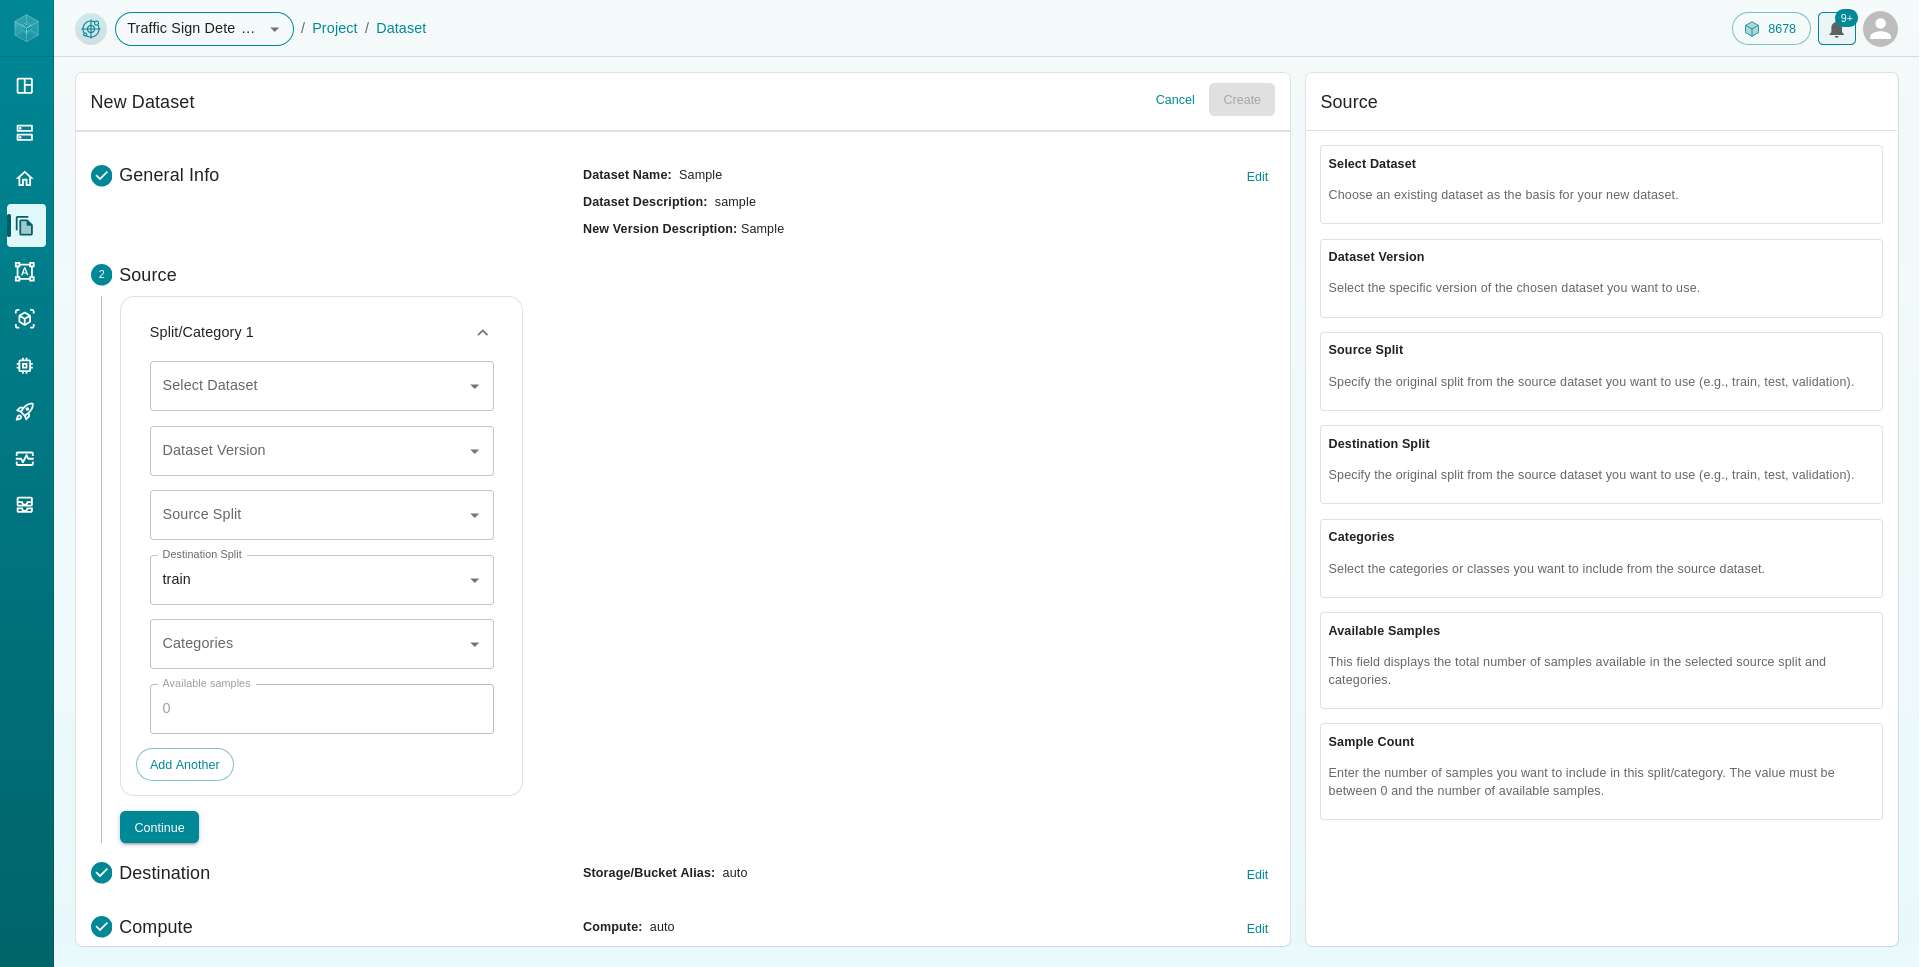
Step 2: General Info
Dataset Name: Enter a unique name for the new dataset.
Dataset Description: Provide a brief description that outlines the purpose and content of the dataset.
Version Description: Include details about this specific version of the dataset (e.g., “v2.0: Created using existing dataset split”).

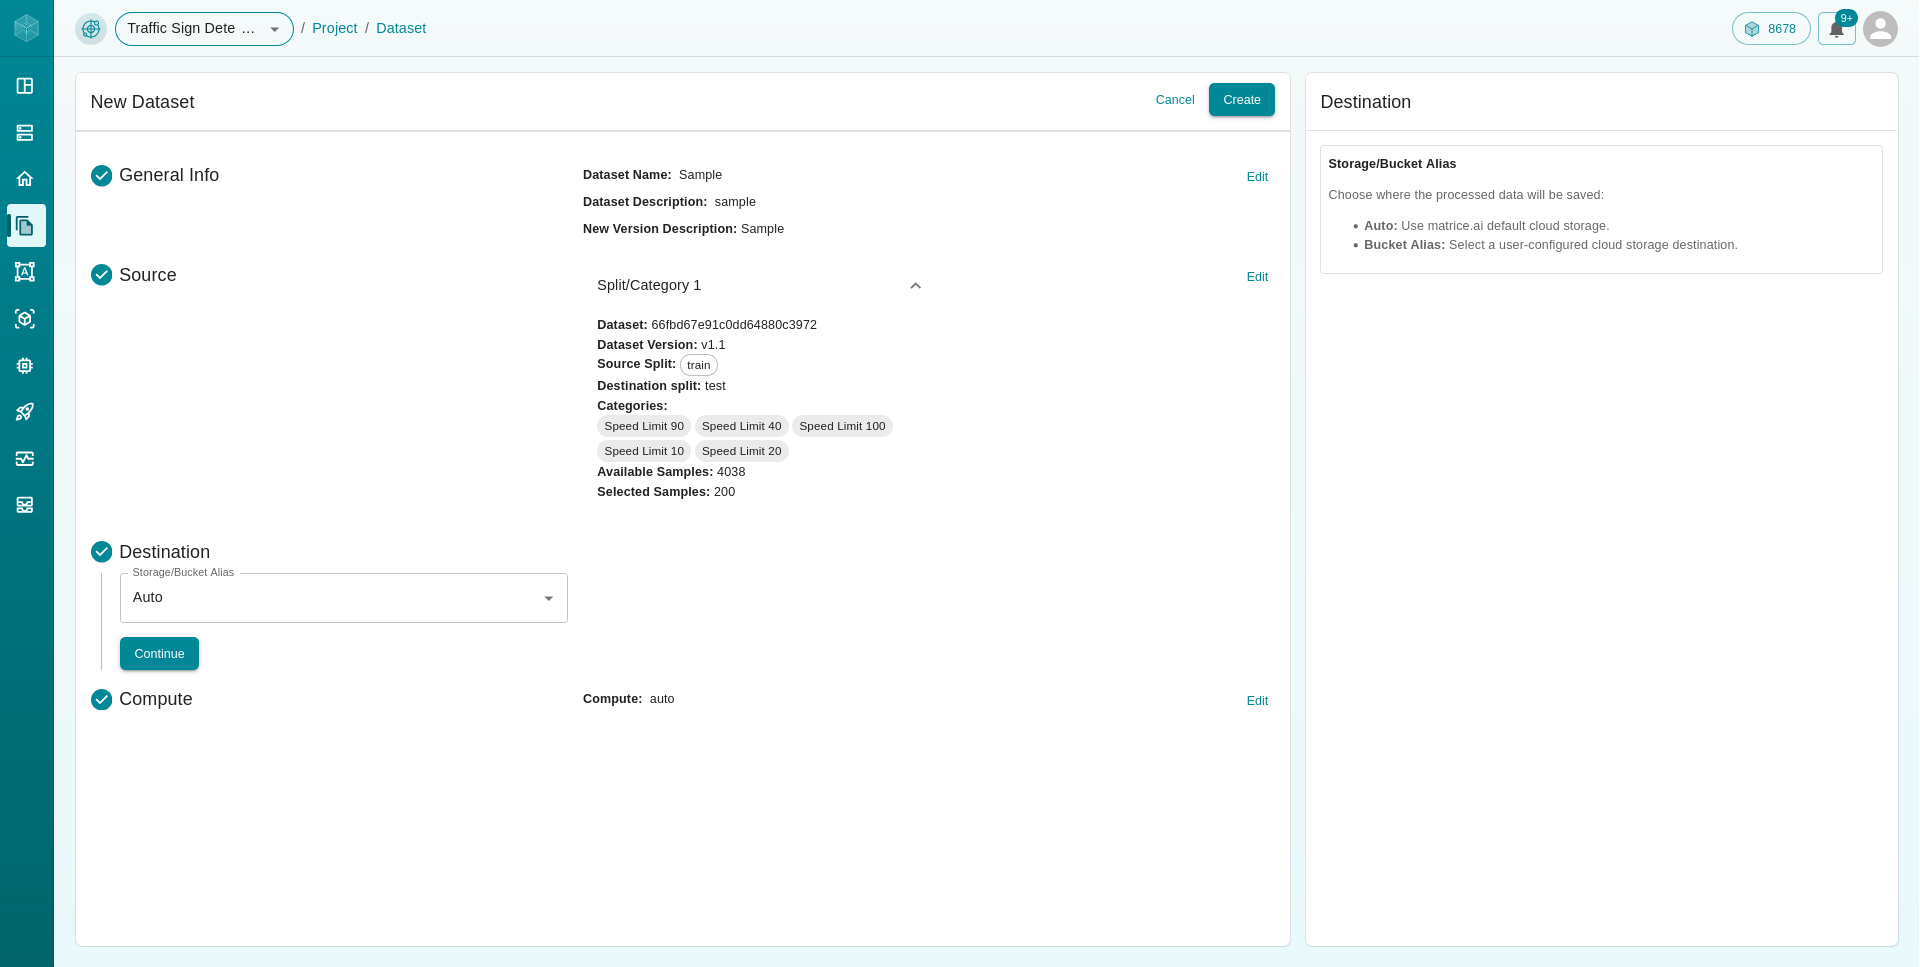
Step 3: Source
Select Use Existing as the source type.
Choose an existing dataset from the list.
Specify the Dataset Version and the Source Split you wish to use (e.g., train, test, validation).
Assign the Destination Split for your new dataset (e.g., train, test, validation).
Select the Categories or classes to include in the new dataset.
Enter the Sample Count for the number of samples to include.
Step 4: Destination
Choose where the processed data will be saved:
Auto: Use Matrice.ai’s default cloud storage.
Custom Bucket Alias: Specify a custom cloud storage destination.
Step 5: Compute
Select the compute instance for data processing:
Auto: Automatically assign a default compute instance.
Custom Compute Instance: Choose a specific compute instance as needed.

Final Step: Submit
After completing all steps, click the Create button to begin the process. Your dataset will be generated using the selected existing data, ready for further analysis and training.
Happy uploading!