BYOM Model Upload Guide (Web Interface)
In this guide, you’ll learn how to upload your models to the Matrice.ai platform using the BYOM (Bring Your Own Model) frontend. Each section will walk you through filling out the required information and validating your uploads step by step.
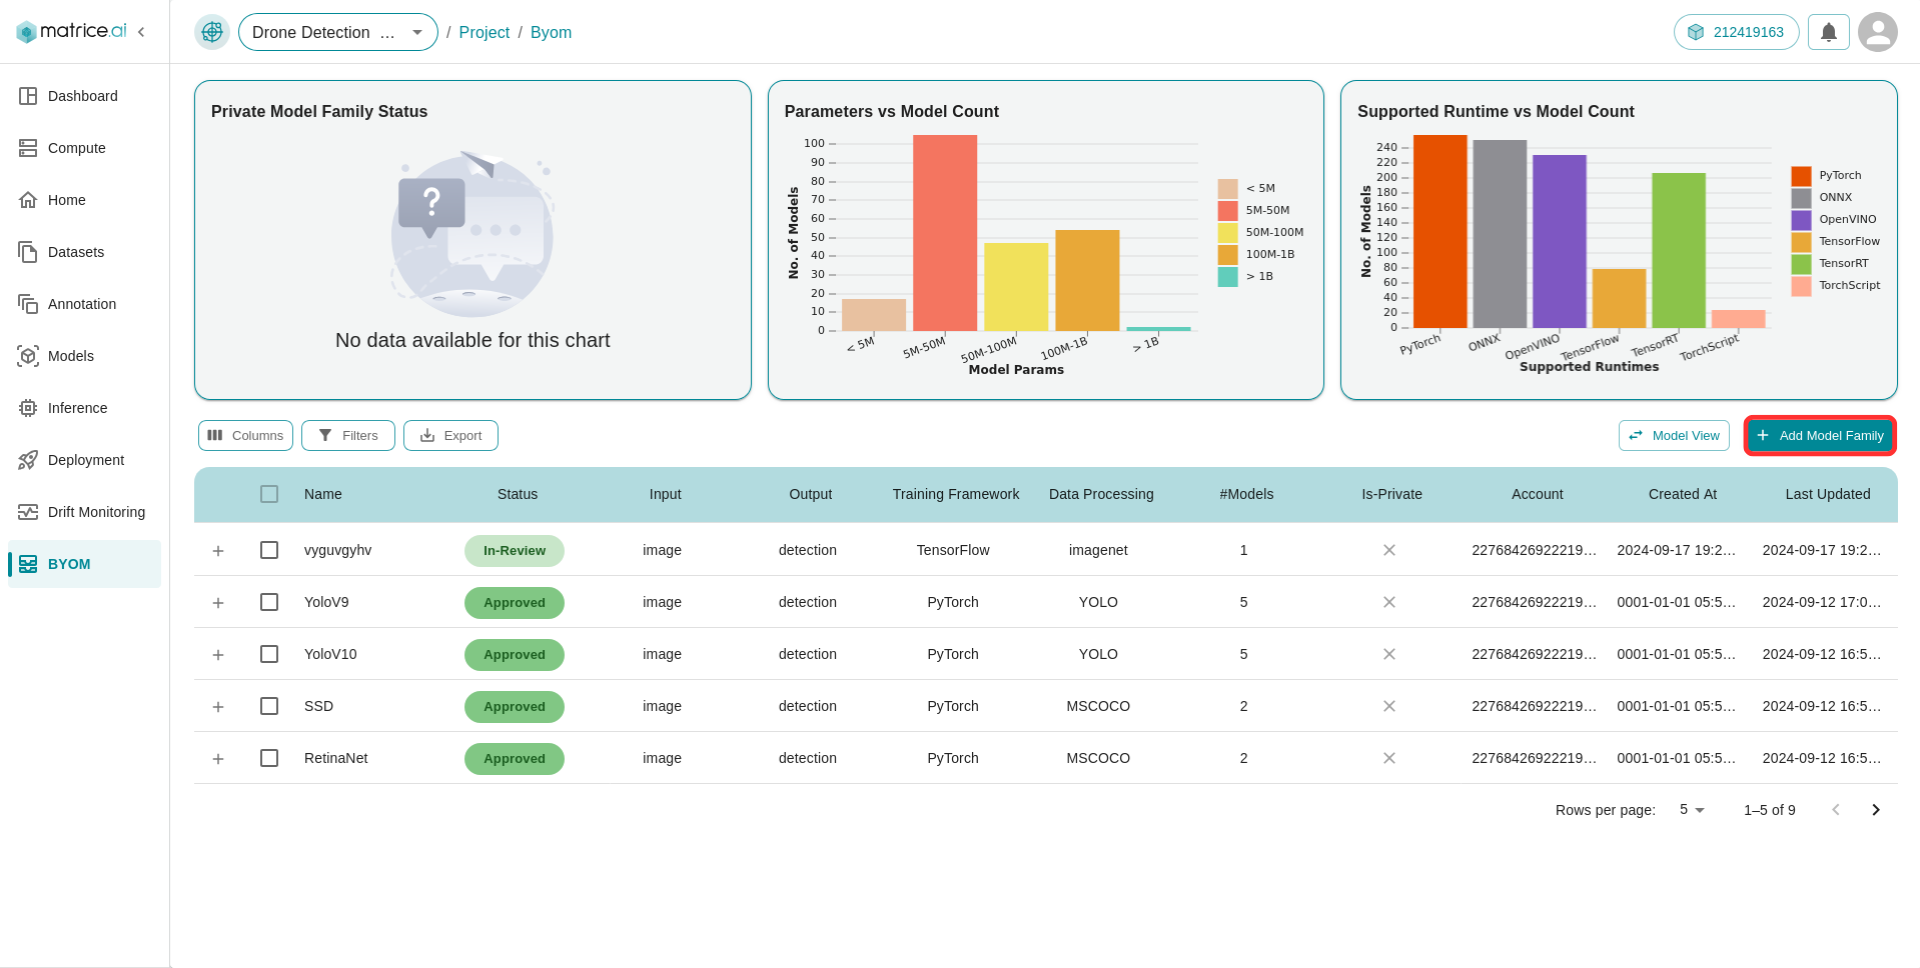
Click on the Add Model Family button to add your models to BYOM
Steps for Uploading Your Model
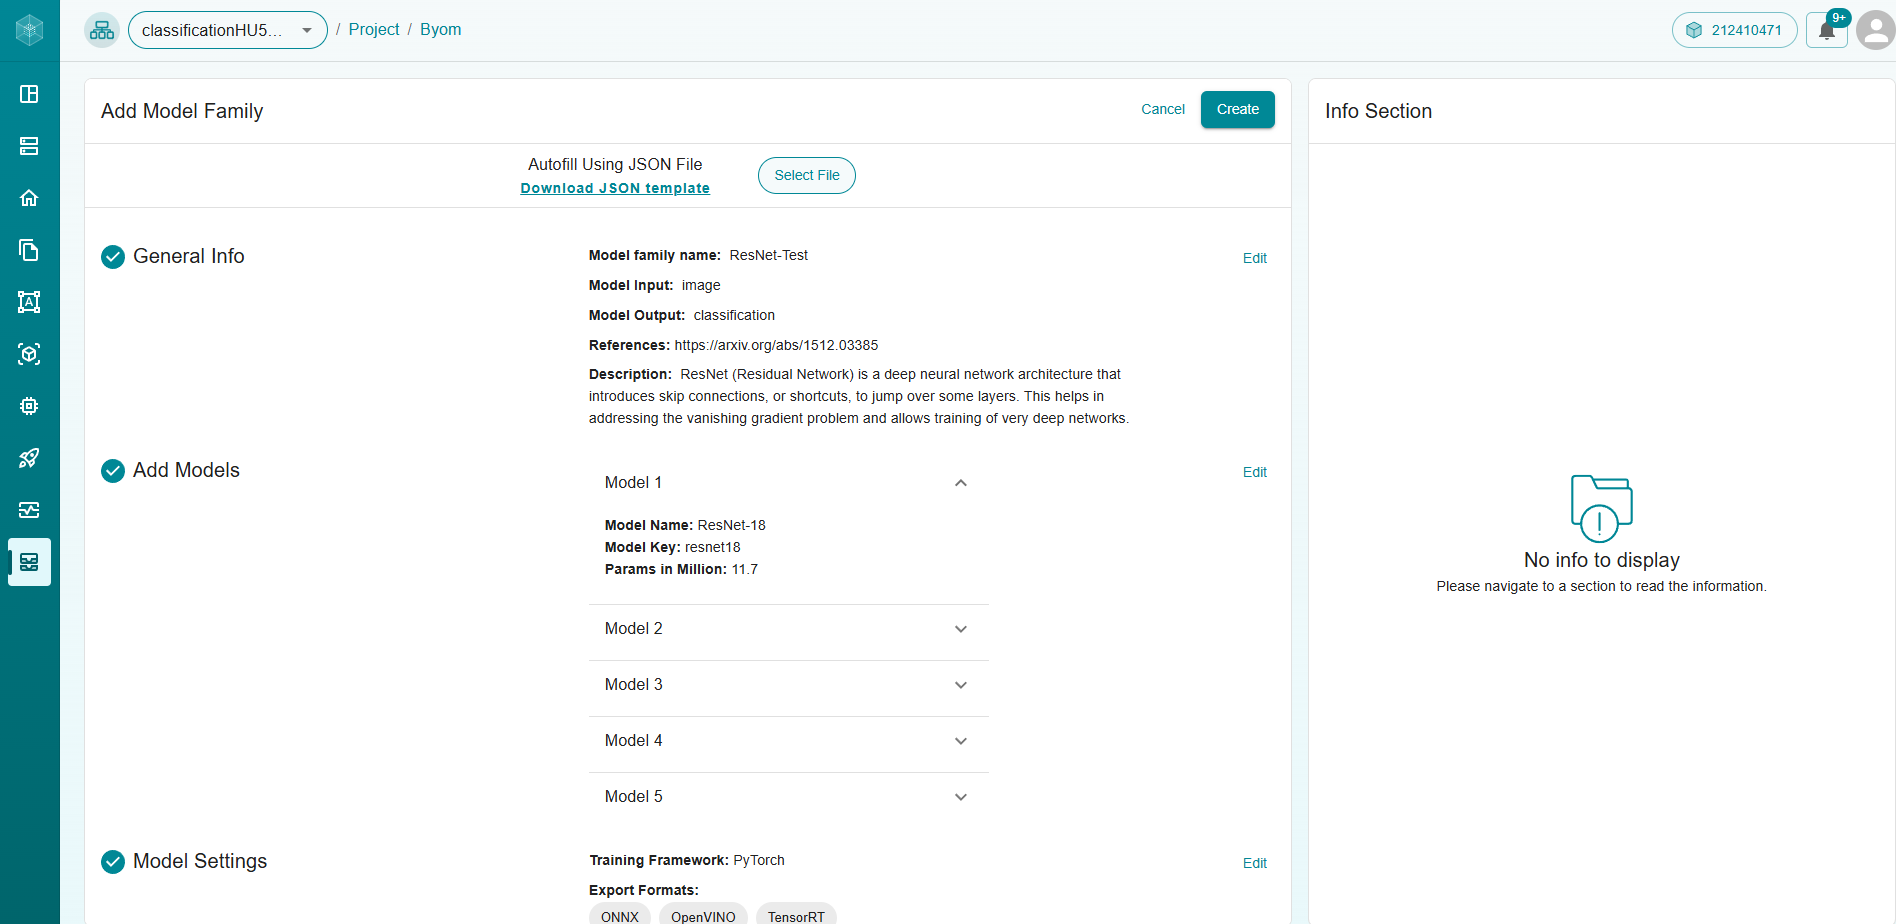
1. Upload Model Family Information
To start, you’ll need to either:
Upload a JSON file containing the model family information.
Fill out a form manually that includes the following fields:
General Information
Model Family Name
Model Input
Model Output
Description
References
Add Models
Model Name
Model Key
Model Params in Million
Model Settings
Training Framework
Export Formats
Supported Metrics
Data Preprocessing
Input Format
Input Size
Benchmark Results
Dataset Format
Split Type
Metric
Value Per Model
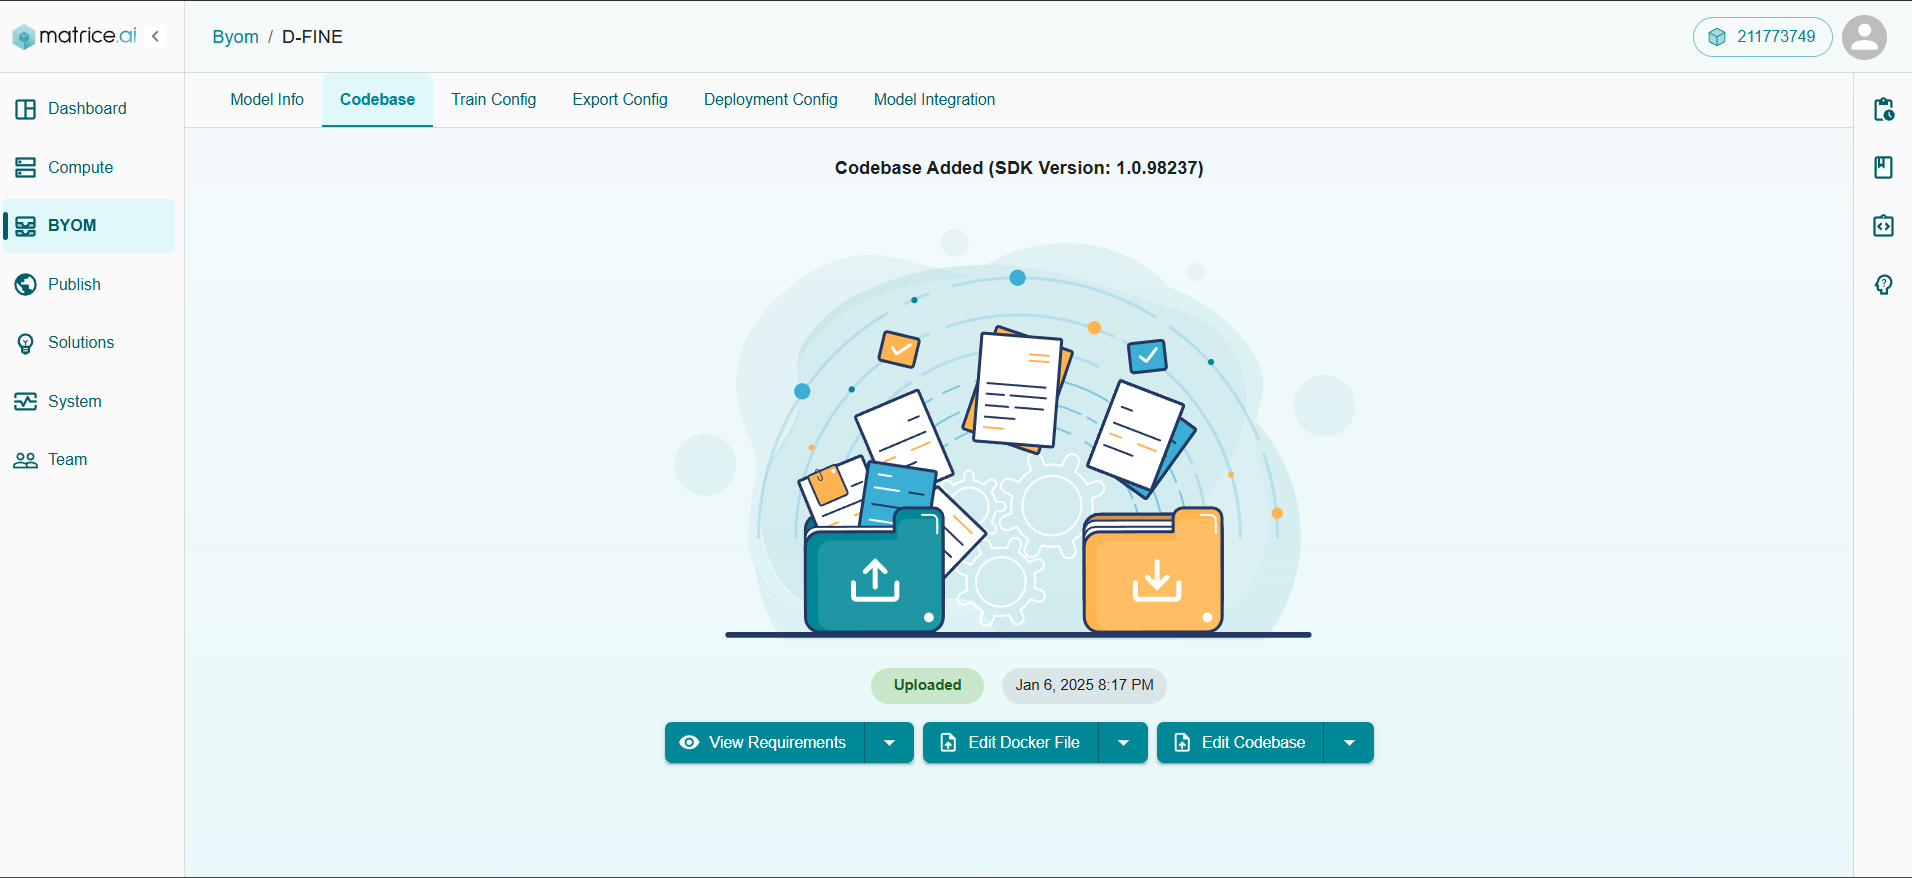
2. Upload the Codebase and Logs
With all configurations validated, it’s time to upload your codebase and logs to kickstart the process. This step ensures that all the essential files are in place for smooth execution.
Here’s what you’ll do:
Upload your requirements.txt file- The requirement.txt file
Upload your Dockerfile- Upload the Dockerfile associated with your codebase
Upload your codebase files — the core scripts and resources you’ve crafted.
Once uploaded, you’ll have the power to:
View, edit, and download the
requirements.txtfile to manage dependencies effortlessly.Download and customize the
Dockerfileand your uploaded codebase to tailor your environment.
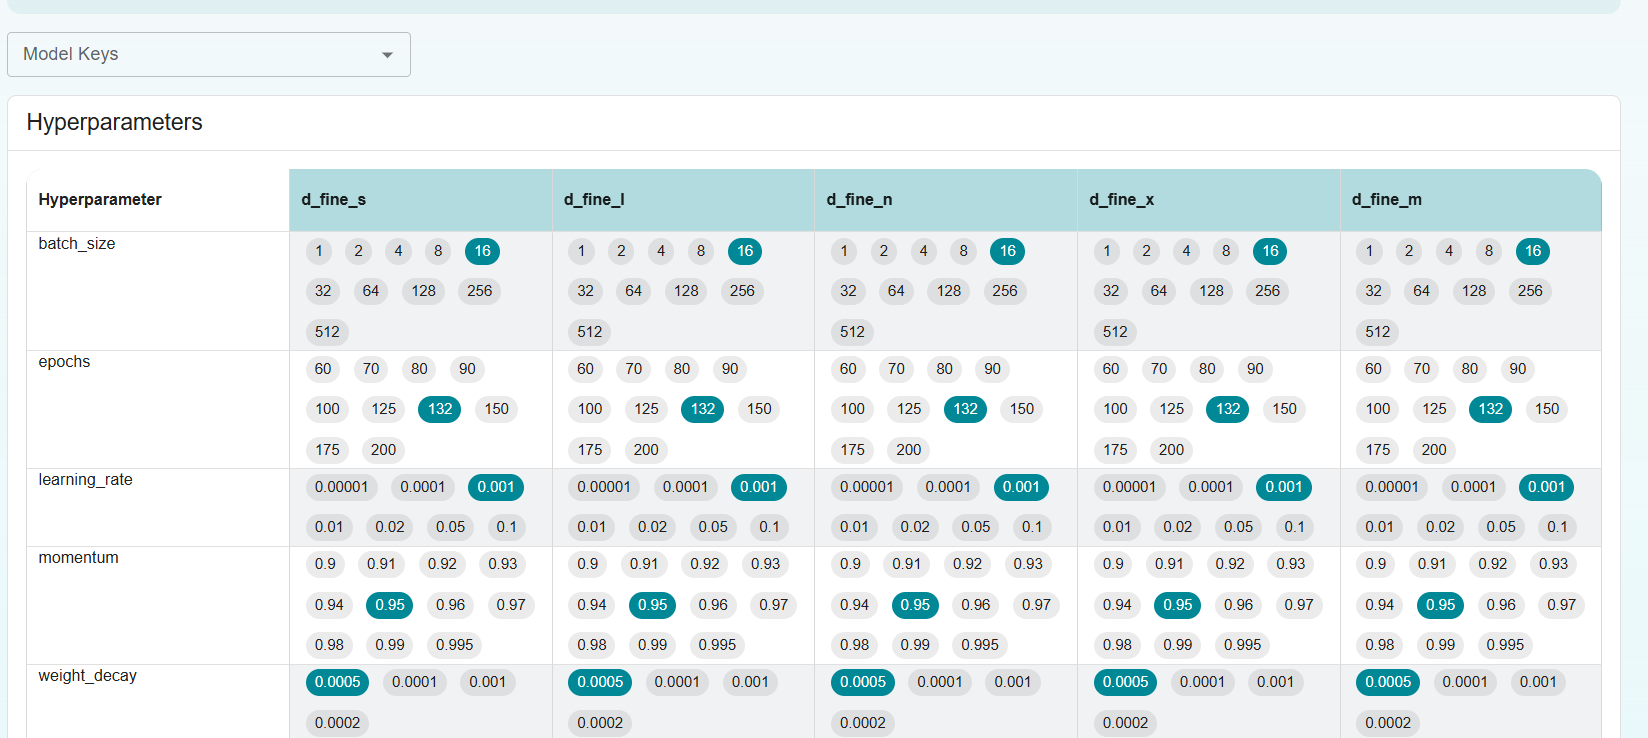
3. Configure Training
Now, let’s set up your training configuration. This step is crucial as it defines how your model will learn from the data. You’ll need to specify details like the training dataset, hyperparameters, and any custom settings.
You have two easy options:
Upload a JSON file containing your training configuration — perfect if you’ve prepped it beforehand.
Manually fill out the form with fields for dataset paths, learning rates, epochs, and more.
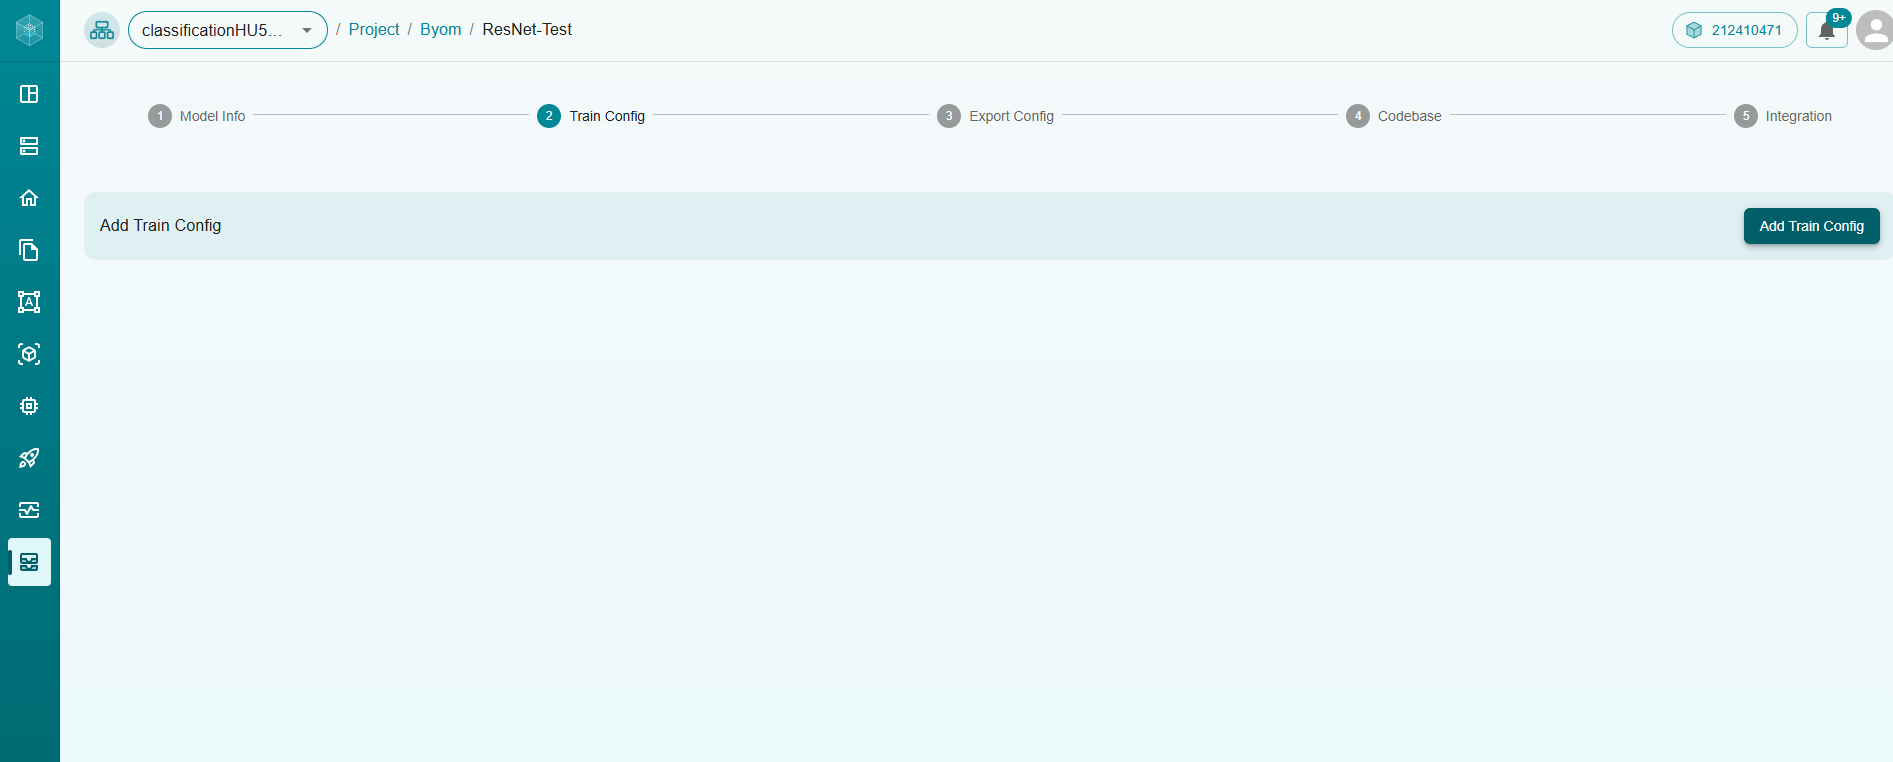
Once your configuration is uploaded or entered, a summary will be displayed. Need to make adjustments? Simply click the Edit button to upload an updated JSON or tweak the form directly.
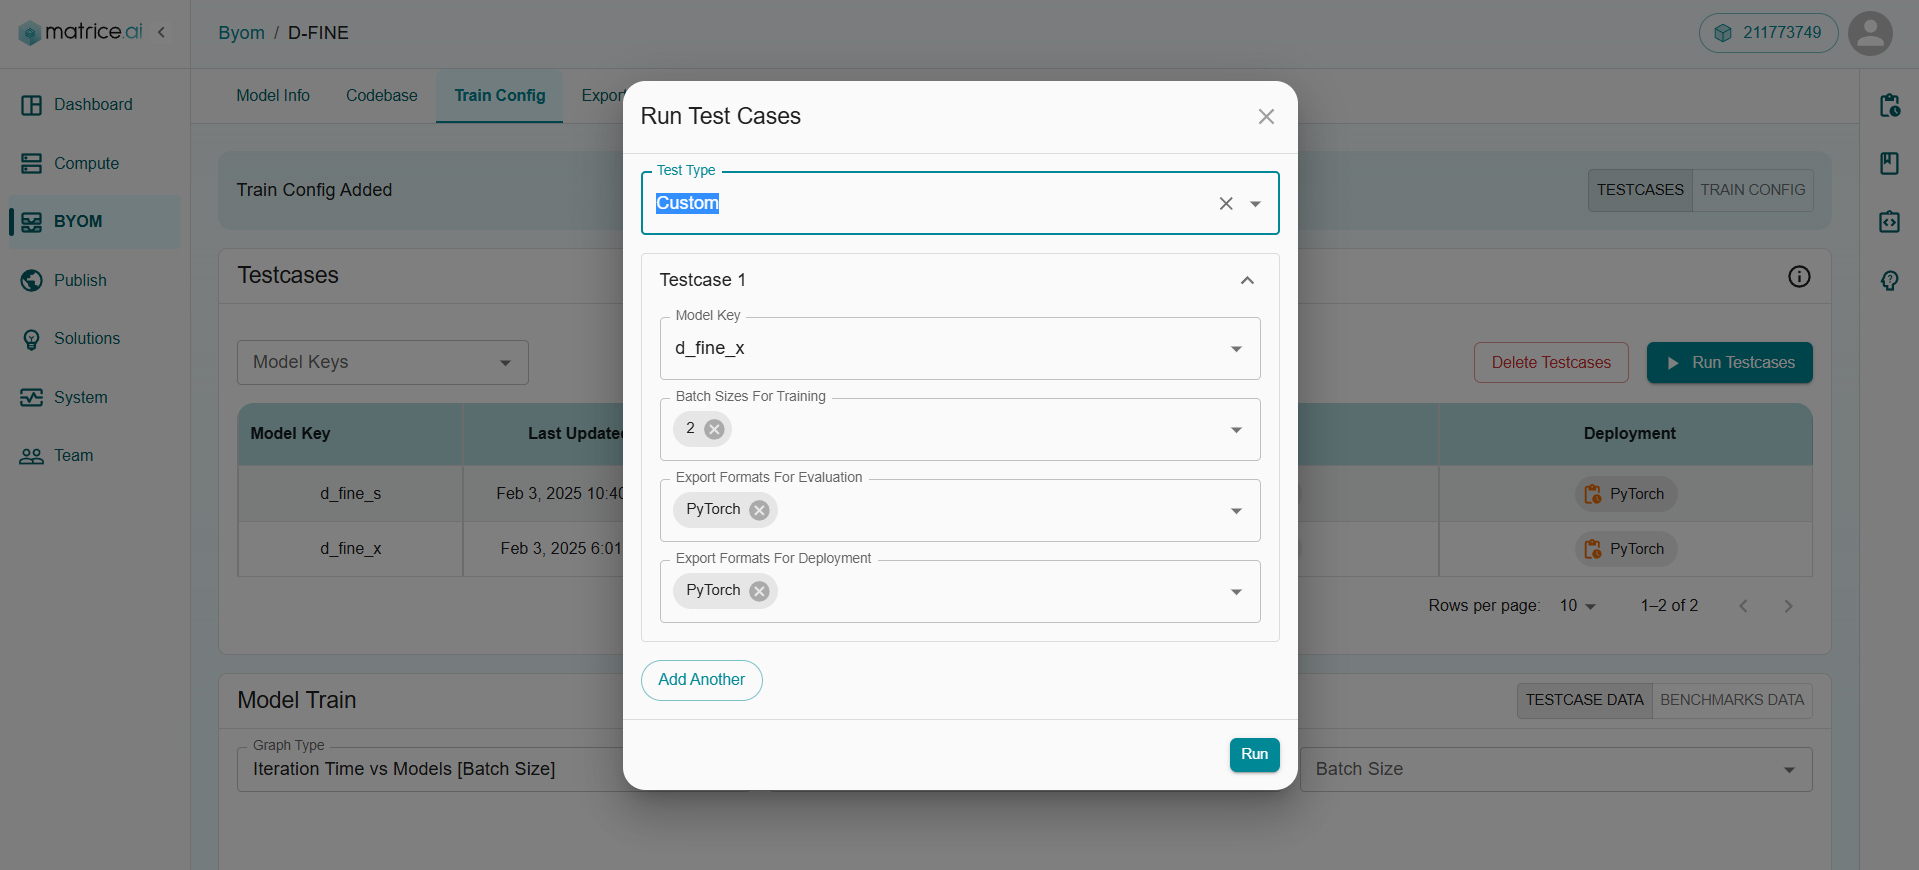
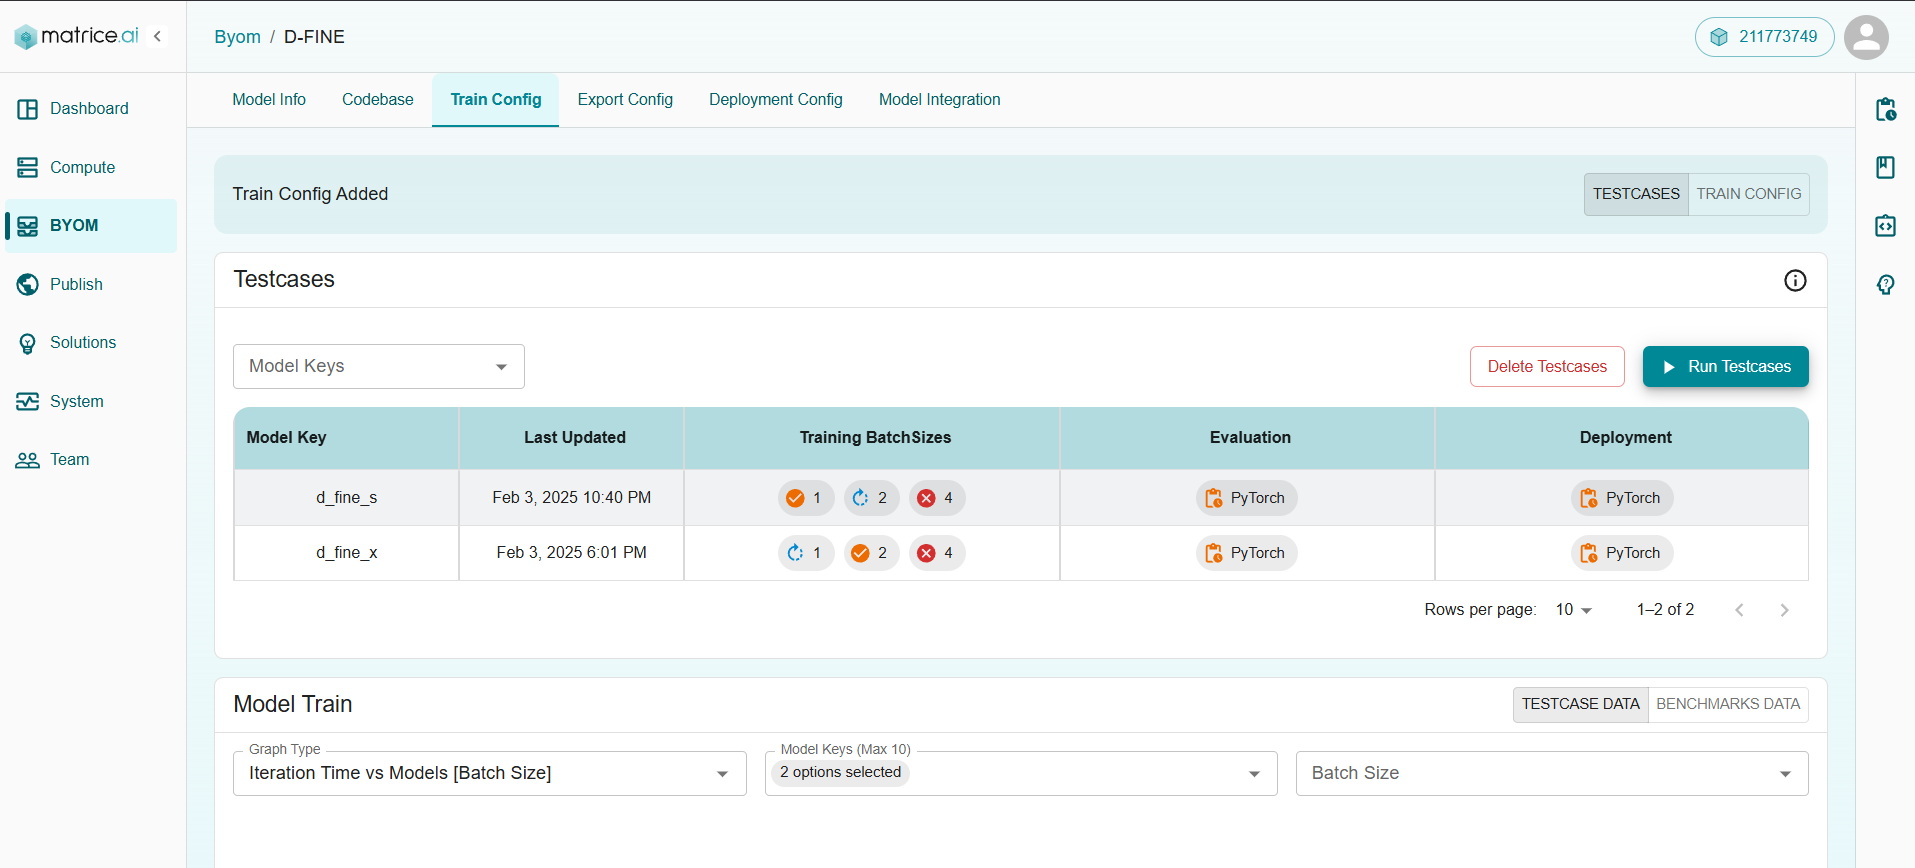
4. Run Training Test Cases
It’s time to validate your training code with some rigorous test cases. Here’s how to proceed:
Click the Run Test Cases button.
Choose a Test Type from the options:
Custom: Handpick models and fine-tune parameters like model key, batch size, export formats for evaluation, and deployment.
Default: Let the system randomly select 20% of models using default settings.
Failed: Quickly retest models that previously failed by auto-filling the form with their details.
Hit Run to kick off the test cases and monitor the results in real-time.
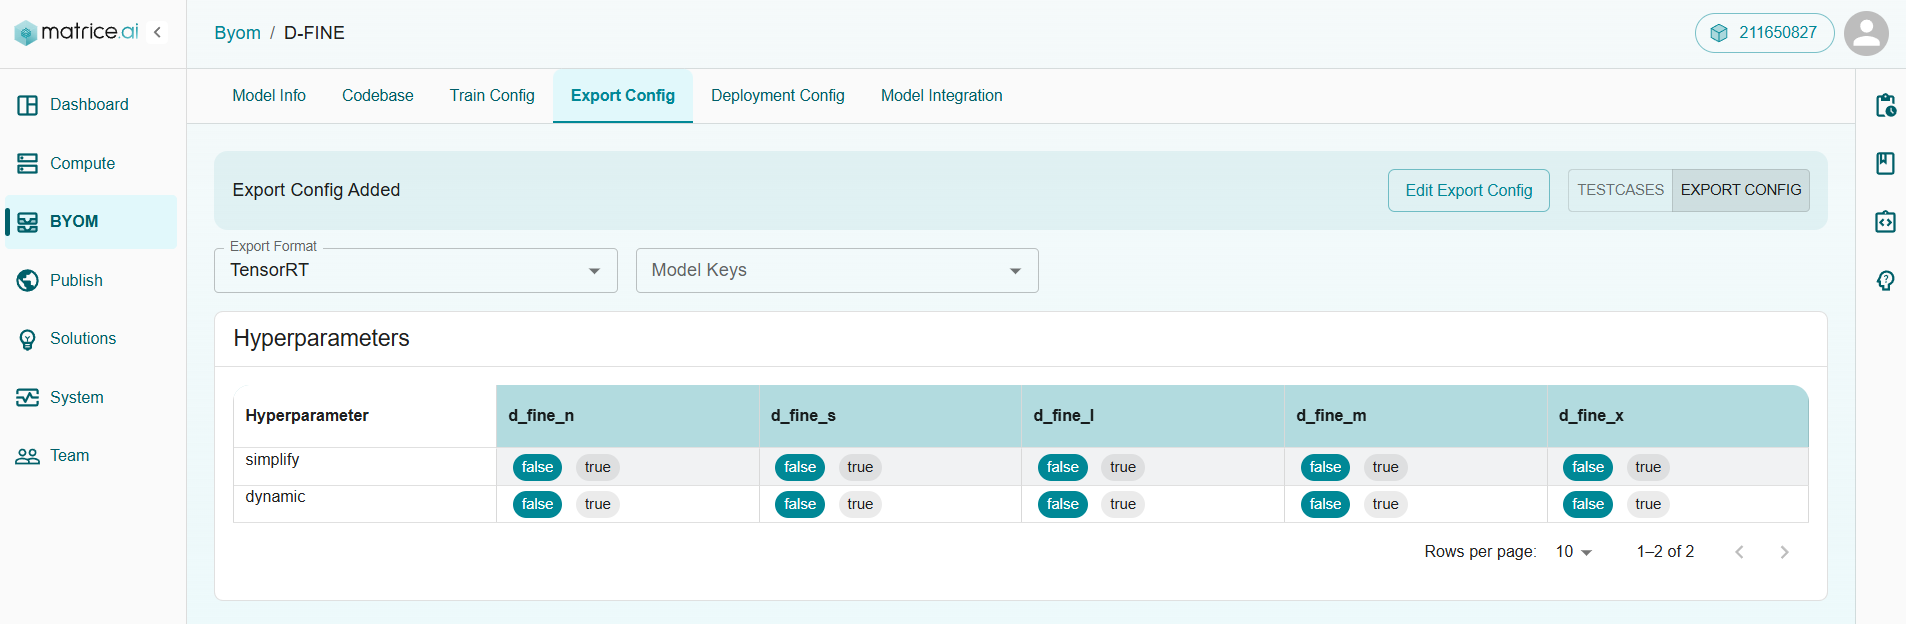
5. Configure Model Export
With training complete, it’s time to define how your model will be exported. This ensures your model is saved in the right format and ready for deployment.
You can:
Upload a JSON file detailing export configurations — including formats and runtime settings.
Fill out the form with specifics like export format (ONNX, TensorFlow SavedModel, etc.) and compatibility options.
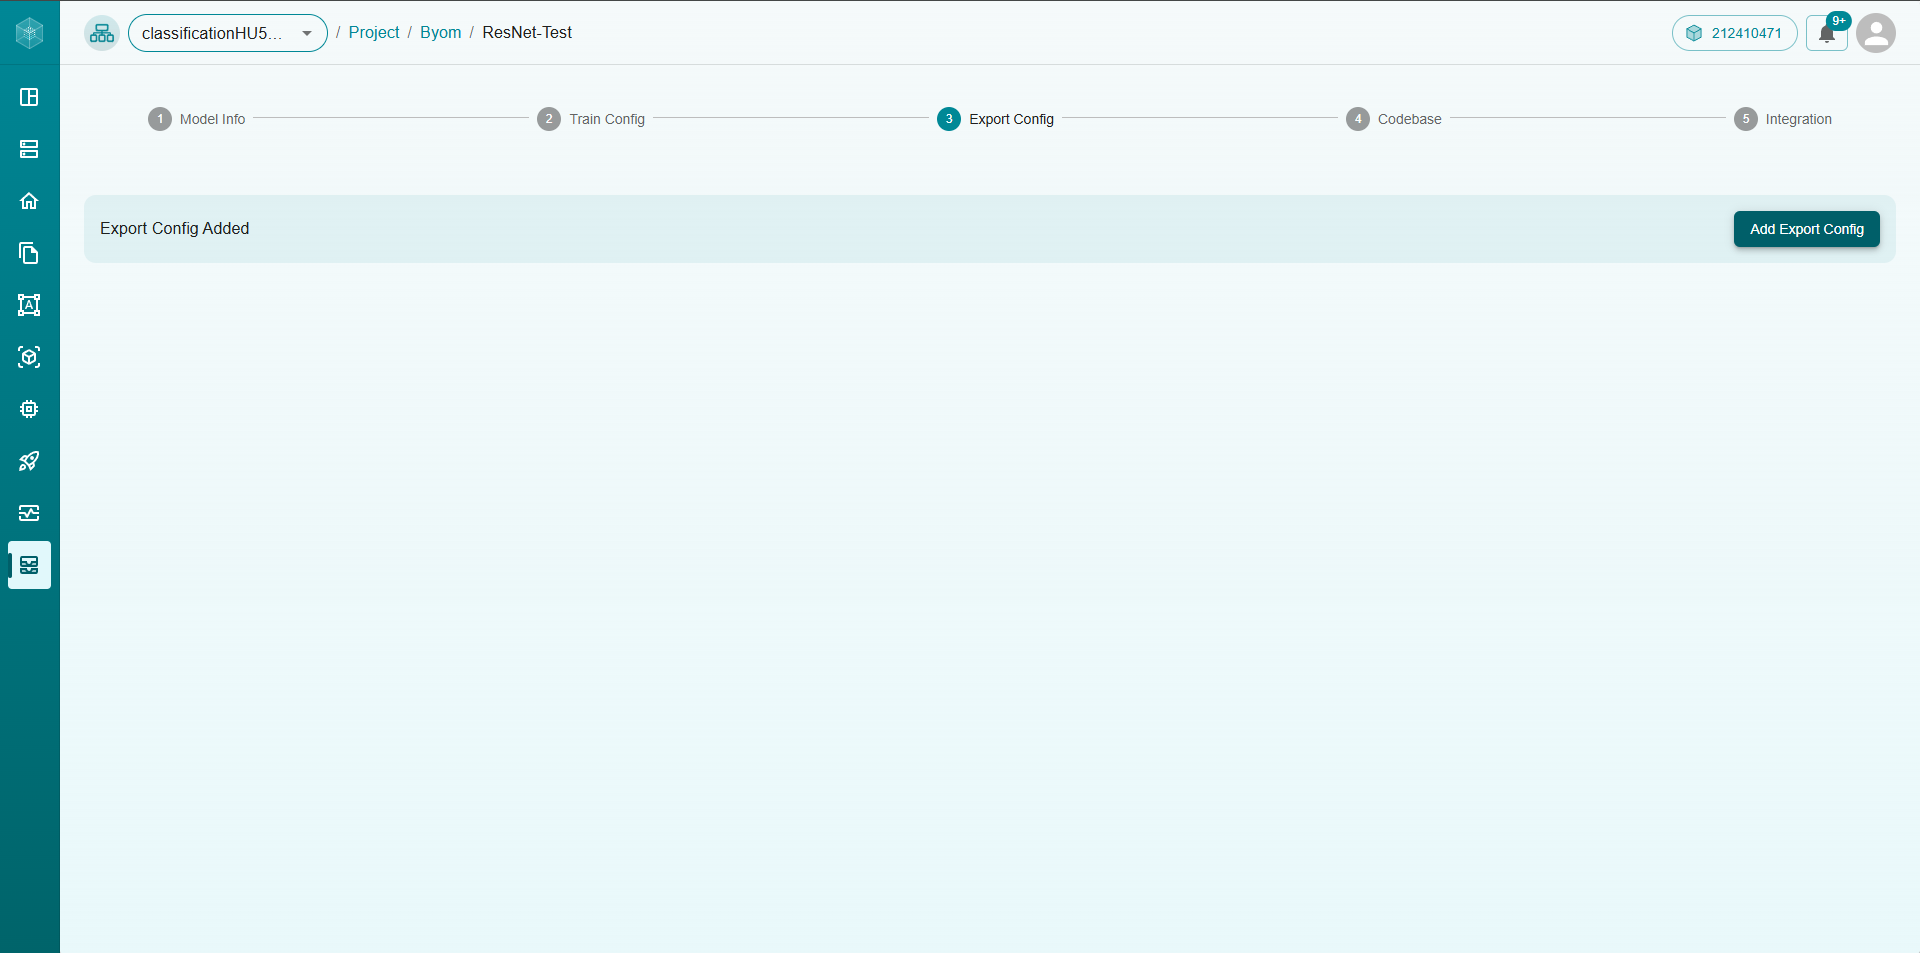
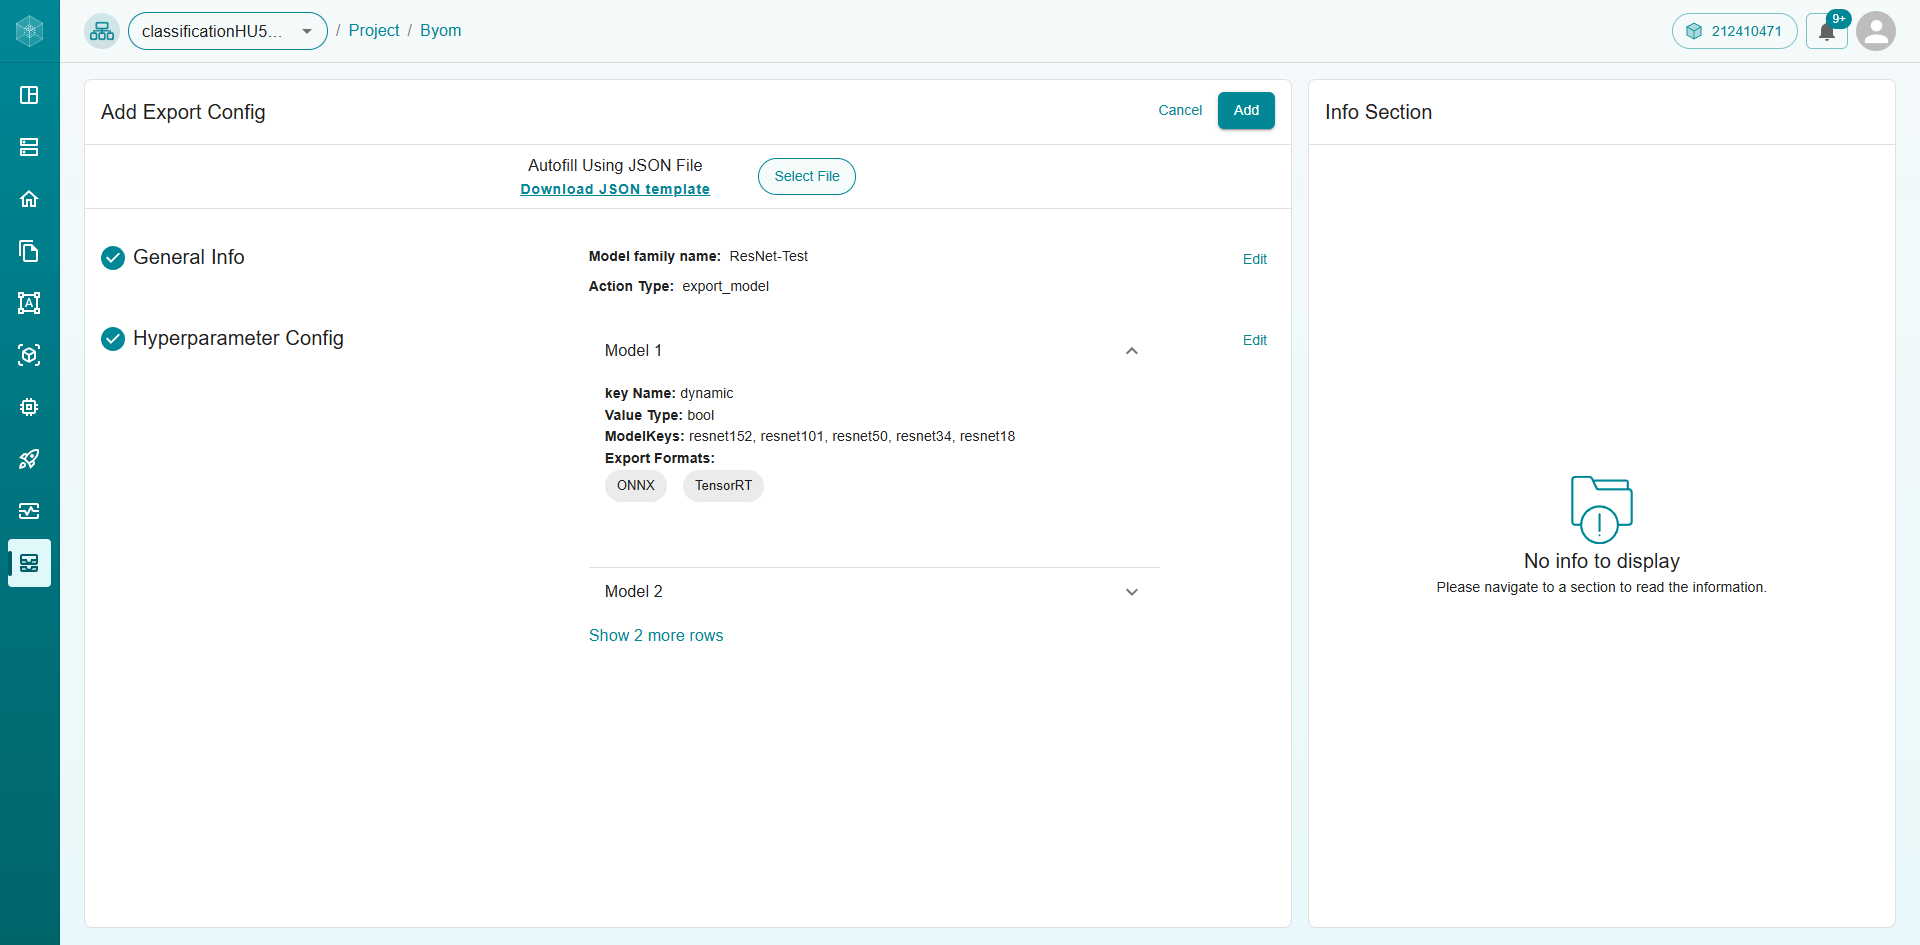
After adding the export configuration, you can easily view and edit it to ensure everything is perfect.
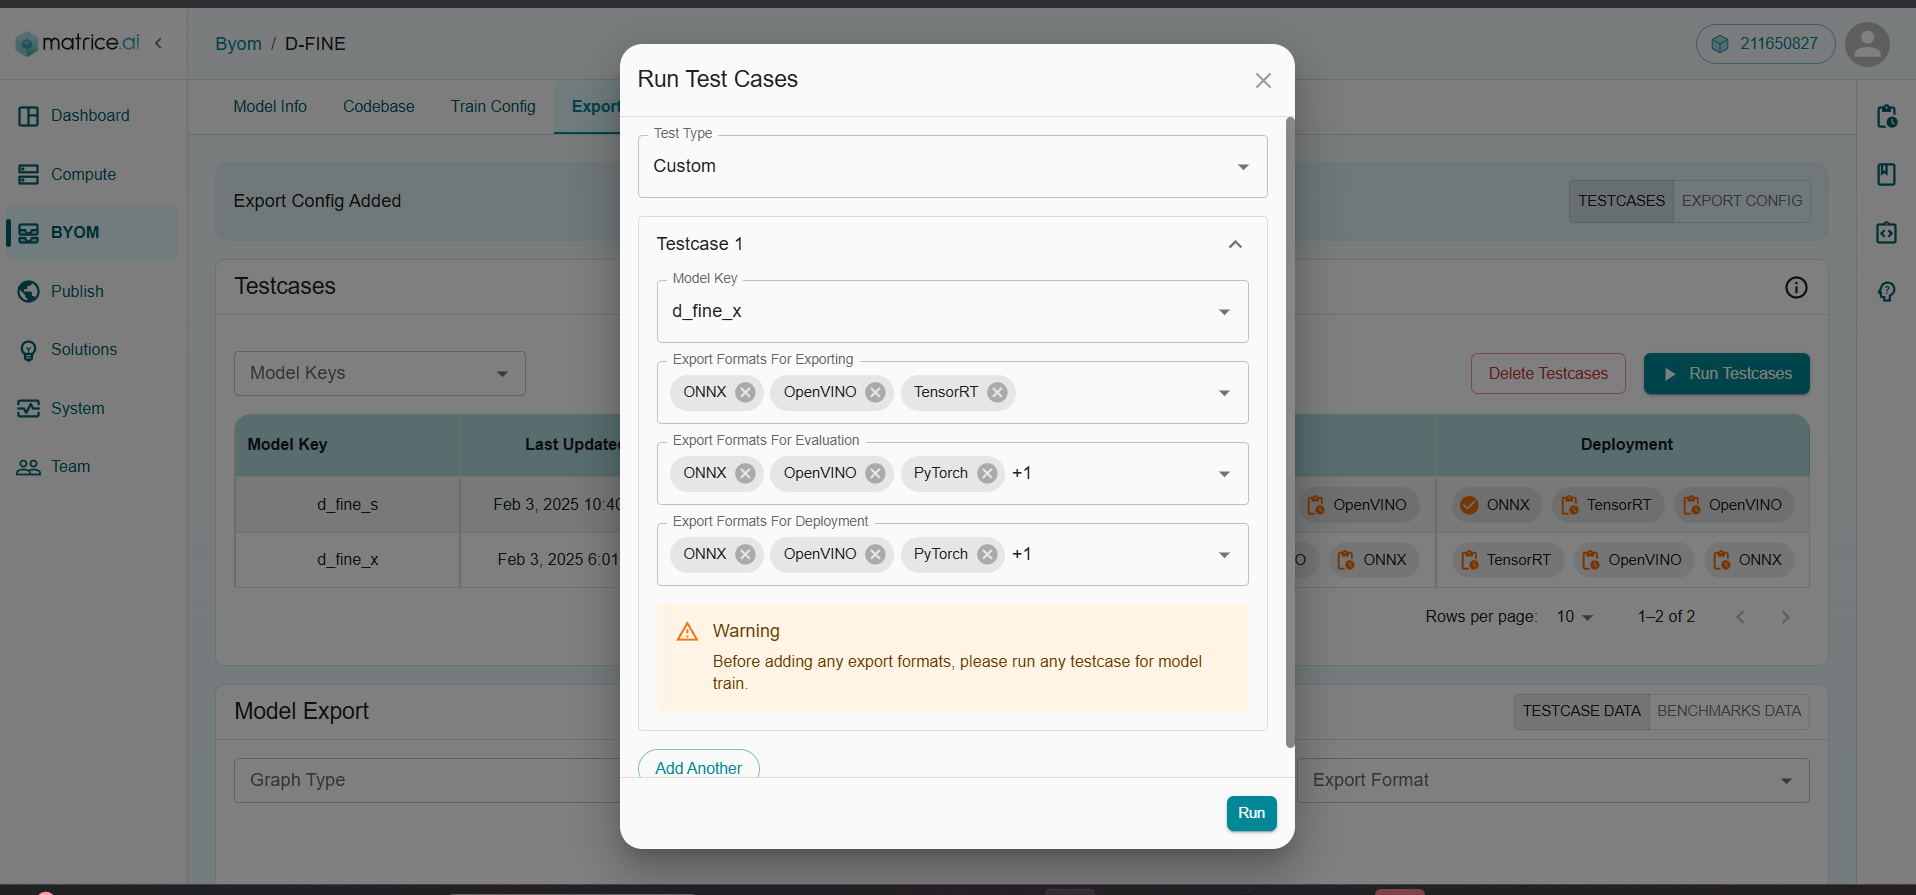
6. Run Export Test Cases
Next, validate your export process by running test cases:
Click Run Test Cases.
Select a Test Type:
Custom: Choose specific models and define export formats for evaluation and deployment.
Default: Automatically picks 20% of models with standard settings.
Failed: Focus on previously failed exports by auto-loading their configurations.
Hit Run to execute the export test cases.
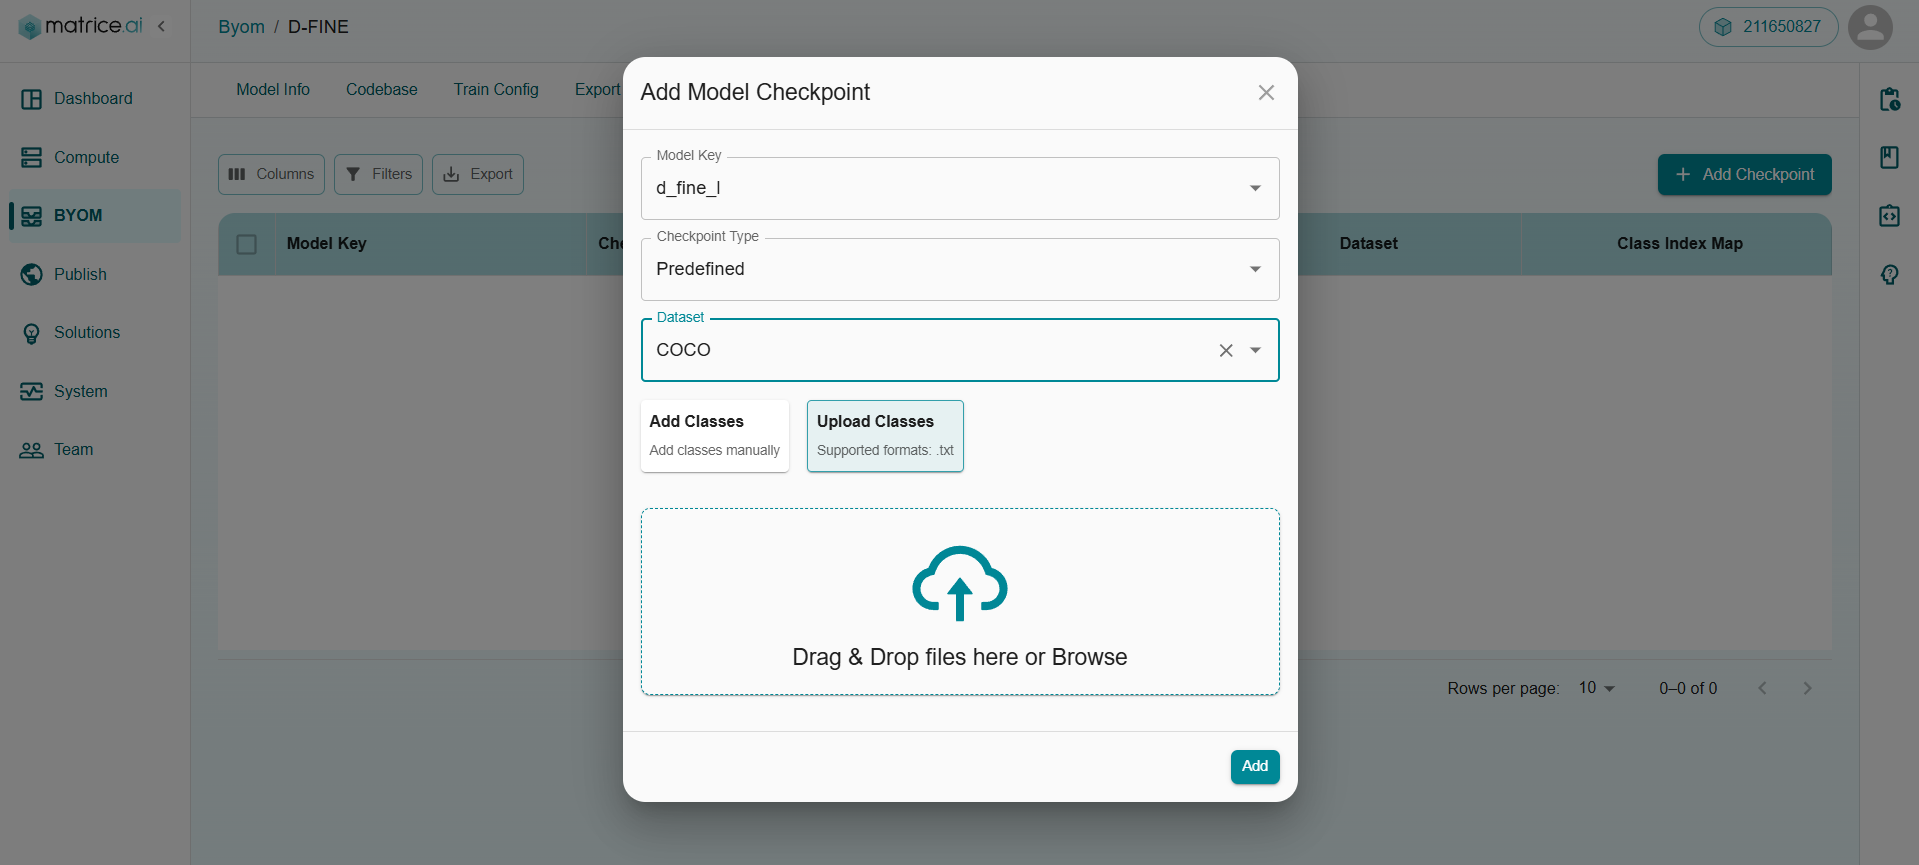
7. Deployment & Checkpoints
It’s time to deploy your trained model and assess its prediction capabilities. Start by adding a checkpoint:
Click Add Checkpoint.
Choose your checkpoint type:
Predefined Checkpoint: Use the checkpoint saved during training for immediate inference.
URL Checkpoint: Provide a public URL to an external checkpoint for flexibility.
After setting the checkpoint, upload the relevant dataset based on your project type. You’ll also need to define the supported classes, either by:
Manually entering class names
Uploading a text file with the list of classes
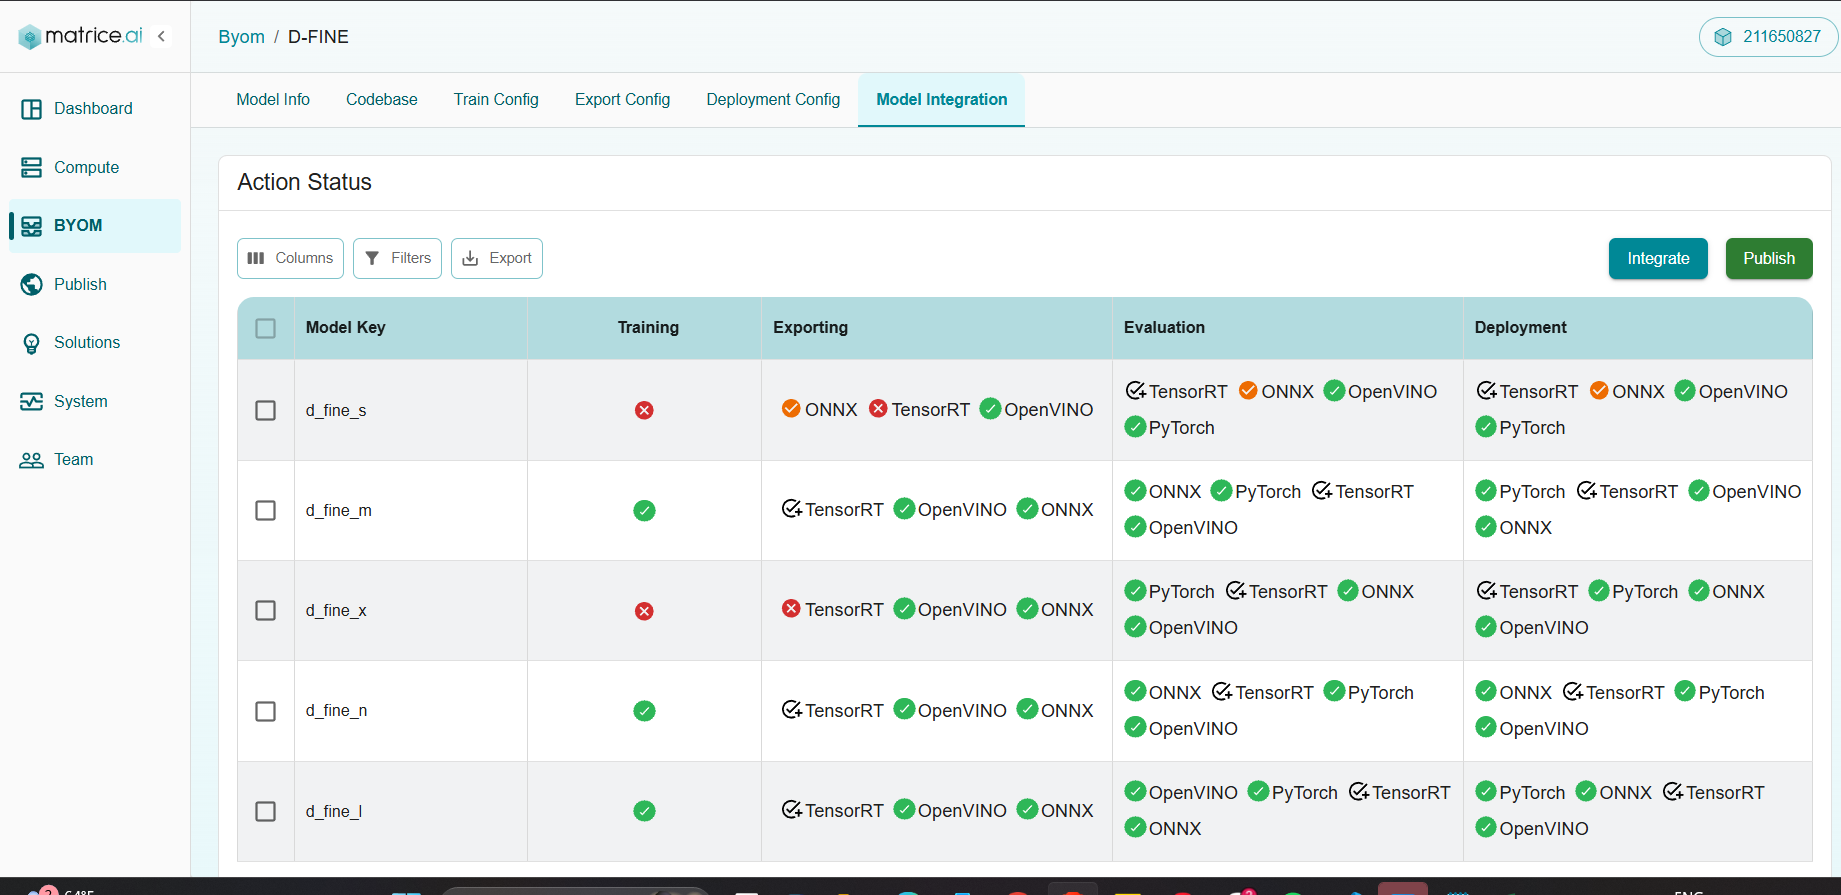
8. Integrate Actions & Run Final Test Cases
With everything in place, it’s time to integrate and run the final tests to bring your model to life:
Select your model.
Click Integrate to initiate training, optimization, and deployment processes.
Once integrated, you can use the model across your projects. Ready to share it with the community?
Click Publish to submit your model for review.
Matrice will evaluate the integrated model, and upon approval, it will go live on the platform.
With this step-by-step process, you can successfully upload your models to the BYOM platform and ensure they are ready for integration.